Difference between revisions of "IOP-050 BTC"
| Line 1: | Line 1: | ||
== | == TP-619 - SAFETY AND DE-ENERGIZATION PROCEDURES == | ||
''' | '''Register your equipment with [https://na.bhs1.com/media-library/bhs-optima/ BHS Optima], BHS's free app.''' | ||
===GENERAL INFORMATION === | |||
The Battery Transfer Carriage (BTC) is used to remove large batteries from electric industrial trucks. | |||
The BTC is either freely maneuvered on casters by a person at the rear of the BTC by pushing/pulling on the handles of the unit or sideways along a designated travel path by a person at either side of the unit pushing/pulling on a handle of the unit. | |||
The BTC can be one of a possible three operating types / options: | |||
<ol> | |||
The following | <li><u>Fully Mechanical Unit</u> - The unit is raised and lowered using a manual, hydraulic jack located at the rear of the unit. The battery is manipulated by either A) a hand winch located at the rear of the unit that is attached to the battery and retracted, pulling the battery onto the unit while physically pushing the battery by hand off of the unit or B) an extractor arm that moves inward and outward using a hand wheel located on the left, rear of the unit to push or pull the battery on and off the unit.</li> | ||
<li><u>Fully Electric Unit</u> - The unit has a fully enclosed, self contained, electrically powered, hydraulic power unit located on the right, rear of the unit. Power is supplied by a 12VDC battery located on the left, rear of the unit. The power unit provides power to raise the unit using a hydraulic cylinder and power to move the extractor arm inward and outward using a hydraulic motor. The lift and extraction functions are controlled by individual manual lever valves located within the power unit housing. This unit may be equipped with an optional vacuum extraction which has a vacuum pump located between the push handles at the rear of the unit powered by the DC battery.</li> | |||
<li><u>Partially Electric Unit </u> - The unit is a combination of either mechanical extraction and electric lift or electric extraction and mechanical lift. Operation of this unit is a combination of each type listed above.</li> | |||
</ol> | |||
=== GENERAL SAFETY === | |||
*Read and understand all instructions and warnings before using or servicing this equipment. | |||
*Keep these instructions for future reference. | |||
*Battery Transfer Carriage (BTC) units shall only be used indoors in an industrial setting on a hard, nonslip, and level floor without defects including but not limited to holes, gouges, cracks, drains or obstacles comprised of concrete or other suitable industrial material. | |||
*Forces required to operate the BTC vary with weight of the load, floor conditions, and carriage conditions. | |||
*BTC units are not designed to be shipped or transported after initial delivery. | |||
*A licensed structural engineer should be consulted prior to installing a BTC on any building level other than the ground floor. | |||
*Perform system and safety check before operating. | |||
*Failure to follow these instructions and warnings may result in property damage, personal injury or death. | |||
====WORK AREA==== | |||
*Keep work area clean and well lit. Cluttered work areas and poor lighting can lead to accidents. | |||
*Clean up/contain any fl uid spills immediately to prevent slips or falls. | |||
*Be aware of potential hazards when performing any service or maintenance to the unit. | |||
====SERVICE & MAINTENANCE==== | |||
Service personnel shall wear Personal Protective Equipment (PPE) appropriate for the task being performed. | |||
====LOCKOUT/TAGOUT==== | |||
Lockout/tagout the BTC per your corporate policy, if damaged or not functioning properly. Lockout/tagout and de-energize all systems prior to performing any maintenance or service to unit. | |||
====LEAD-ACID BATTERIES-EXPLOSION HAZARD==== | |||
[[File:Warning bhs sign (2).JPG]] | |||
'''Do not allow open flames or sparks of any kind near a battery. Highly explosive gas is generated when charging a battery that can remain in battery cells for extended periods of time after charging is complete.''' | |||
*Always wear appropriate PPE including rubber apron, gloves, boots and full face shield when performing service or maintenance to any lead-acid batteries. | |||
*Do not place metal or other conductive objects on top of battery. Arcing may occur causing damage to the battery and/or serious personal injury or death. | |||
*Use only chargers matching the voltage and amperage of the battery being charged. Overcharging a battery can cause damage to the battery, charger and/or serious personal injury or death. | |||
*Turn off charger before disconnecting battery from charger. Arcing between battery and charger connectors can cause damage to the connectors and/or serious personal injury or death. | |||
====HYDRAULIC HAZARD==== | |||
[[File:Warning bhs sign (1).JPG]] | |||
'''AVOID HIGH PRESSURE FLUIDS-Escaping fluid under pressure can penetrate the skin causing serious injury. Relieve pressure before disconnecting hydraulic lines. Tighten all connections before applying pressure. Keep hands and body away from pin holes which eject fluids under high pressure. Use a piece of cardboard or paper to search for leaks. DO NOT use your hand. ''' | |||
'''Any fluid injected into the skin under high pressure should be considered a serious medical emergency despite an initial normal appearance of the skin. There will be a delayed onset of pain, and serious tissue damage may occur. Medical attention should be sought immediately.''' | |||
=== OPERATIONAL SAFETY === | |||
====OPERATIONAL SAFETY ==== | |||
*Only personnel trained in the proper and safe operation of BTC units may operate or service the BTC. | |||
*Operators shall wear appropriate PPE suitable for working with industrial lead-acid batteries while operating the BTC (see prior page). | |||
*All data plates, warning labels, placards, etc shall be in place and legible at all times. Contact BHS for replacement data plates, warning labels, placards or instructions. | |||
*All users and service personnel shall be familiar with the meaning and risks associated with all data plates, warning labels, etc. | |||
*All operators and service personnel shall be aware of potential crush and shear points while operating or servicing the BTC, including the casters and brakes. | |||
*BTC should be operated in an area with ambient light levels of at least 50 lux. | |||
*Keep hands and arms out of the battery compartment while operating the BTC. | |||
*Engage the battery stop(s) and properly secure the battery prior to transporting the battery. | |||
*Attach the hook and chain (if equipped) to the battery prior to transporting the battery. | |||
*Avoid abrupt changes in direction when transporting a battery in the BTC to prevent loss of the battery and/or loss of control of the BTC. | |||
*Remove BTC from service if damaged, defective, or operating improperly (or becomes such while operating) until repairs can be made to correct any problem(s). | |||
====DO’s AND DON’T’s==== | |||
*'''DO NOT''' exceed the maximum capacity of the BTC. | |||
*'''DO NOT''' modify or fit the BTC with attachments without prior, written approval from BHS. | |||
*'''DO NOT''' perform any maintenance or service to the BTC with a battery loaded on the BTC. | |||
*'''DO NOT''' allow anyone to ride in or on the BTC. | |||
*'''DO NOT''' operate the BTC with any guard or cover removed unless required for maintenance or repair. | |||
*'''DO NOT''' travel with the stop bar in the raised position. | |||
*'''DO NOT''' lower the inside frame on any person or object. | |||
*Disconnect the battery (if equipped) before attempting to perform service or maintenance to the BTC. | |||
*'''DO NOT''' use the BTC in a manner for which it is not intended. Some examples of prohibited use are but not limited to: | |||
>>As a scooter or to transport people | |||
>>As a vehicle jack | |||
>>To lift loads greater than its rated load capacity | |||
>>Where unintentional movement may exist | |||
>>Having direct contact with foodstuff | |||
>>In a potentially explosive atmosphere | |||
=== DE-ENERGIZATION === | |||
'''BTC/BTC-MPP:''' | |||
<ol> | |||
<li>Turn the pump release handle counterclockwise to lower the inner carriage and release hydraulic pressure. See Figure 1</li> | |||
[[File:Warning bhs sign (1).JPG]] | |||
Failure to lower the inner carriage when performing service to the BTC could result in injury from the roller bed lowering unexpectedly. | |||
[[File:IOP-050 BTC (03-29-10) FIGURE 1.JPG|300px|none|caption]] | |||
FIGURE 1 | |||
</ol> | |||
'''BTC-MPPEL/MPPEE/MPPAE:''' | |||
<ol> | |||
<li>Unplug the battery charger (if equipped).</li> | |||
<li>Disconnect the positive cable from the battery post. Secure the positive cable so it cannot contact the positive battery post. See Figure 2.</li> | |||
[[File:Warning bhs sign (1).JPG]] | |||
'''Failure to disconnect electrical power to the BTC could result in electrical shock.''' | |||
[[File:IOP-050 BTC FIGURE 2.JPG|300px|none|caption]] | |||
FIGURE 2 | |||
<li>Cycle the manual valves several times to relieve stored hydraulic pressure. See Figure 3.</li> | |||
[[File:Warning bhs sign (1).JPG]] | |||
'''Failure to release any stored hydraulic pressure could result in injury from:''' | |||
'''Escaping hydraulic fluid under high pressure (see HYDRAULIC HAZARDS in the GENERAL SAFETY section).''' | |||
'''Unexpected movement of hydraulic components.''' | |||
[[File:IOP-050 BTC FIGURE 3.JPG|300px|none|caption]] | |||
FIGURE 3 | |||
</ol> | |||
===LABELS & PLACARDS === | |||
[[File:IOP-050-BTC-(03-29-10)-8-card.jpg |1000px|border]] | |||
==GENERAL INFORMATION == | |||
===MODEL NUMBER & OPTIONS=== | |||
[[File:IOP-050-BTC-(03-29-10)-9.jpg|1000px|border]] | |||
===SPECIFICATIONS=== | |||
[[File:IOP-050-BTC-(03-29-10)-10.jpg|1000px|border]] | |||
===INSTALLATION=== | |||
The following describes the basic installation procedures for the BTC battery transfer carriage. | |||
<ol> | |||
<li>Once the carriage has been removed from the shipping 1. pallet, the floor lock(s) must be attached. The floor lock is attached to the lower frame on the operator side below the lift cylinder with the supplied hardware. See Figures 1 - 3. </li> | |||
''Notes: BTC-30 units have two floor locks. The floor lock is only to be used when parking the carriage when not in use.'' | |||
[[File:IOP-050 BTC (03-29-10)image--039.jpg|300px|none|caption]] | |||
FIGURE 1 | |||
[[File:IOP-050 BTC (03-29-10)image--040.jpg|300px|none|caption]] | |||
FIGURE 2 | |||
[[File:IOP-050 BTC (03-29-10)image--041.jpg|300px|none|caption]] | |||
FIGURE 3 | |||
<li>Ensure that the lift cylinder is properly aligned with the hole located on the underside of the inner frame. This will ensure safe, even lifting. See Figure 4.</li> | |||
[[File:IOP-050 BTC (03-29-10)image--042.jpg|300px|none|caption]] | |||
FIGURE 4 | |||
<li><u>Winch units only:</u> Unbolt the winch support and reposition it toward the rear of the unit. See Figure 5. | |||
</li> | |||
[[File:IOP-050 BTC p11 figure5.JPG|300px|none|caption]] | |||
FIGURE 5 | |||
<li><u>Electric units only:</u>Connect the positive cable to the positive terminal of the battery. See Figure 6. </li> | |||
''Note: The battery must be disconnected prior to charging.'' | |||
[[File:IOP-050 BTC (03-29-10)image--043.jpg|300px|none|caption]] | |||
FIGURE 6 | |||
<li>The carriage is now ready for use. </li> | |||
</ol> | |||
===OPERATING CONTROLS=== | |||
The following is a brief operational overview of the BTC. | |||
<ul> | <ul> | ||
<li> | '''EXTRACTION CONTROLS''' | ||
<li> | |||
<li> | <li><u>Winch Extraction</u> - Rotate the winch handle counterclockwise to extend the winch strap and rotate the winch handle clockwise to retract the winch strap. Winch direction is changed by switching the lever at the rear of the winch. See Figure 7</li> | ||
<li> | |||
[[File:IOP-050 BTC (03-29-10)image--046.jpg|300px|none|caption]] | |||
FIGURE 7 | |||
<li><u>Mechanical Extraction </u> - Turn the hand wheel counterclockwise to extend the extractor arm toward the lift truck or battery stand and clockwise to retract the extractor arm. See Figure 8. | |||
''Note: The extractor arm latch must be raised to move the arm when fully retracted. See Figure 9.'' | |||
</li> | |||
<gallery mode="nolines"> | |||
File:IOP-050 BTC (03-29-10)image--048.jpg|FIGURE 8 | |||
File:IOP-050 BTC (03-29-10)image--049.jpg|FIGURE 9 | |||
</gallery> | |||
<li><u>Electric Extraction</u> - With the green power button depressed, push the extraction valve handle to the right to extend the extractor arm toward the lift truck or battery stand and push the valve handle to the left to retract the extractor arm. See Figure 10.</li> | |||
[[File:IOP-050 BTC (03-29-10)image--047.jpg|300px|none|caption]] | |||
FIGURE 10 | |||
<li><u>Vacuum (if equipped) </u> - Pull up the vacuum switch to energize the vacuum pump and push down to de-energize the vacuum pump.</li> | |||
'''LIFT CONTROLS''' | |||
<li><u>Mechanical Lift </u> - Insert the jack handle into the jack handle socket and pump the jack handle up and down to raise the inner carriage. To lower the inner carriage, slowly turn the release handle located at the base of the manual jack counterclockwise. Turn the release handle clockwise to stop lowering the inner carriage. See Figures 11 & 12.</li> | |||
<gallery mode="nolines"> | |||
File:IOP-050 BTC (03-29-10)image--051.jpg|FIGURE 11 | |||
File:IOP-050 BTC (03-29-10)image--052.jpg|FIGURE 12 | |||
</gallery> | |||
<li><u>Electric Lift </u> - With the green power button depressed, push the lift valve handle to the left to raise the inner carriage and push the valve handle to the right to lower the inner carriage. See Figure 13.</li> | |||
[[File:IOP-050 BTC (03-29-10)image--050.jpg|300px|none|caption]] | |||
FIGURE 13 | |||
'''BRAKES''' | |||
<li><u>Vector Brakes </u> - The vector brakes are used when transferring batteries from the BTC to the industrial truck or battery stand. To engage the vector brake, lift the release handle up and slide it forward allowing the vector brake to lower to the floor. To disengage, lift the release handle up until the notch in the release handle is allowed to move rearward, locking the brake in the raised position. See Figures 14 & 15.</li> | |||
[[File:IOP-050 BTC (03-29-10)image--055.jpg|300px|none|caption]] | |||
FIGURE 14 | |||
[[File:IOP-050 BTC (03-29-10)image--054.jpg|300px|none|caption]] | |||
FIGURE 15 | |||
<li><u>Floor Lock </u> - The floor lock is to be used any time the BTC is left unattended. DO NOT use the floor lock during the change out process. To engage the fl oor lock, press down on the pedal with your foot. To disengage, press either of the two release tabs on the side of the floor lock with your foot. See Figure 16.</li> | |||
[[File:IOP-050 BTC (03-29-10)image--056.jpg|300px|none|caption]] | |||
FIGURE 16 | |||
'''OPERATIONAL TEST''' | |||
After the initial installation has been completed or any service to the unit has been performed, an operational test should be conducted to ensure proper functions of the unit prior to returning the BTC back into service. | |||
<li><u>Extractor Arm </u> - Verify proper arm travel by slowly moving the extractor arm fully in and out of the battery compartment.</li> | |||
<li><u>Lift</u> - Verify proper lift by slowly raising and lowering the inner carriage through the entire lift range. | |||
</li> | |||
<li><u>Vector Brakes </u> - Verify operation by engaging and disengaging the vector brake to ensure smooth operation and verify complete contact of the brake pad with the floor. While engaged, carefully pull rearward on the cart to ensure proper engagement of the vector brakes.</li> | |||
''Note: When unloaded, it is normal for the front casters of the carriage to lift off the floor as the vector brakes engage.'' | |||
<li><u>Floor Lock </u> - Verify operation by engaging the floor lock and ensure the carriage cannot move when pushed or pulled with moderate force.</li> | |||
<li><u>Vacuum (if equipped) </u> - Verify the vacuum pump energizes and there is suction at the vacuum port of the vacuum cup.</li> | |||
</ul> | </ul> | ||
''' | === OPERATING INSTRUCTIONS === | ||
The following instructions will guide you through the basic steps necessary to operate and change batteries with a BTC. | |||
Operators must be equipped with all necessary PPE and be properly trained in handling industrial lead-acid lift truck batteries. | |||
<ol> | |||
<li>If not already in place, position industrial truck (pallet or lift truck) which requires a battery change in the appropriate staging area.</li> | |||
<li>Disconnect the battery leads and remove any battery restraints.</li> | |||
<li>Move the BTC into position such that the roller compartment of the BTC is aligned with the battery compartment of the industrial truck.</li> | |||
<li>Verify the battery safety stop at the end of the BTC roller bed is in the down position.</li> | |||
<li>Adjust the vertical height of the BTC battery compartment to the battery compartment of the industrial truck or slightly higher. ['''DO NOT exceed 1/4" difference.'''].</li> | |||
<li>Once the proper height is achieved, the extractor arm can be moved toward the lift truck battery. <br><u>Hook and Chain </u>- Stop the extractor arm approximately 3" - 4" from the battery. <br><u>Vacuum Extraction</u> - Bring the vacuum cup in contact with the battery. DO NOT force the extractor arm into the battery once contact is made. | |||
</li> | |||
<li>For hook and chain units, attach the hook securely through the lifting eye of the battery and ensure full engagement. See Figure 17. For vacuum units, energize the vacuum.</li> | |||
[[File:IOP-050 BTC (03-29-10)image--058.jpg|300px|none|caption]] | |||
FIGURE 17 | |||
<li>Slowly begin removing the battery from the industrial truck battery compartment while inspecting the vertical alignment of both battery compartments. If vertical adjustment is required, disengage the vacuum cup (if equipped) prior to adjusting the height of the BTC.</li> | |||
<li>Once the battery is entirely inside the BTC battery compartment, move the battery safety stop to the upright position. For electric units, secure the battery for transport by moving the battery forward using the extractor arm to “pin” the battery between the extractor arm and battery stop to prevent the battery from rocking front to back. If equipped, turn off the vacuum.</li> | |||
<li>The battery may now be transported to the charging area. | |||
<br>''Note: When possible, always push carriage so as to not create a hazard should you slip while pulling the carriage. Batteries are heavy and could cause personal injury under such conditions.''</li> | |||
<li>Align the BTC with an open roller compartment in the battery charging area.</li> | |||
<li>Adjust the vertical height as needed for alignment with the battery stand.</li> | |||
<li>Engage both vector brakes.</li> | |||
<li>Lower the battery safety stop at the front of the carriage.</li> | |||
<li>Slowly move the battery from the BTC into the battery stand. For vacuum equipped units, it is not necessary to energize the vacuum for this step.</li> | |||
<li>After transfer, raise the battery stop on the stand and disconnect the hook from the battery. DO NOT force the extractor arm into the battery after the battery is completely in the stand.</li> | |||
<li>Reposition the BTC at the location of the newly charged battery to be installed in the lift truck.</li> | |||
<li>The above process can be used to remove a battery from the roller stand to be installed into the industrial truck.</li> | |||
<li>After completing battery changes, the floor lock(s) should be engaged prior to leaving the BTC unattended.</li> | |||
'''As with all material handling equipment, the transfer carriage should be inspected prior to each use for any visual damage. It should also undergo a routine inspection by trained maintenance personnel to verify and maintain the load capacity of the unit.''' | |||
</ol> | |||
=== MANUAL UNLOADING=== | |||
'''Lockout/tagout and de-energize all equipment prior to manually unloading any battery. | |||
''' | |||
In the event of power loss or an operational malfunction of the BTC not allowing the battery to be unloaded using normal operating procedures, it is recommended the battery be removed from the BTC using certifi ed and approved vertical extraction methods and devices. | |||
[[File:Warning bhs sign (2).JPG]] | |||
'''Read, understand and observe all safety warnings and procedures related to the vertical extraction device(s) being used.''' | |||
If certified and approved vertical extraction methods and/or devices are not available and the unit’s casters and lift/lower functions operate normally, the battery may be unloaded by hand as follows: | |||
1. Move the BTC into position such that the roller compartment of the BTC is aligned with an empty battery stand roller compartment. Verify the battery safety stop(s) of the empty roller compartment is in the down position. | |||
2. Engage the vector brakes on both sides of the BTC. | |||
3. Adjust the vertical height of the BTC roller compartment with the empty roller compartment or slightly higher. DO NOT exceed 1/4” difference. Verify the battery safety stop(s) at the end of the BTC roller bed is in the down position. | |||
4. Carefully push the battery by hand from the BTC into the battery stand. Move the battery safety stop(s) of the battery stand to the up position. | |||
[[File:Warning bhs sign (1).JPG]] | |||
'''Hand position should be carefully selected to prevent accidental crushing. Maintain a secure footing to prevent slips, trips or falls.''' | |||
[[File:IOP-050 BTC (03-29-10)2019-07-25 at 2.23.13 PM.jpg|1000px|border]] | |||
=== SERVICE & MAINTENANCE === | |||
The following items are recommended by the factory to have on hand for BTC models to minimize any downtime due to minor breakdown that may occur under normal operating conditions. | |||
[[File:IOP-050-BTC-(03-29-10)-18.jpg|1000px]] | |||
Use only BHS approved replacement parts. | |||
BHS recommends that a full maintenance inspection report similar to the one provided be done at least once a month. | |||
Any parts found to be excessively worn or damaged should promptly be replaced unless said parts pose a safety risk to the operator and/or extractor, in which case the unit should be removed from service until the problem(s) are remedied (See Operator’s Daily Checklist.) | |||
'''“READY” STATUS INDICATOR LIGHT ''' | |||
BTC electric motors are protected by an internal thermal switch. If the motor gets too hot, the switch will open so the motor will not operate. When this happens the green light will not be lit. This switch will reset automatically and the light will be lit again when the motor has cooled sufficiently. | |||
The unit is “Ready” for use when the green light is lit. If the light is not lit, check the following: | |||
1. Verify the battery voltage is the same as listed on the serial plate. | |||
2. Verify the correct polarity at the light terminals. | |||
If both these items are correct, then the thermal switch may have opened. Let the motor cool for about 30 minutes and check the green light again. If the green light does not come on, call for service. | |||
'''HYDRAULIC SYSTEM''' | |||
For electric units, the reservoir should be fi lled within 1" of the top of the reservoir with approximately 0.8 Gal / 3.0 L of Chevron hydraulic oil AW ISO 32 or equivalent ISO 32 grade hydraulic oil with anti-wear additives and foam suppressant. | |||
''NOTE: It is not necessary to bleed the system after filling the unit.'' | |||
'''DISPOSAL OF WASTE MATERIAL''' | |||
Dispose of all fluids and waste according to local regulations. | |||
[[File:IOP-050 BTC (03-29-10)-19.jpg|1000px|border]] | |||
== PARTS SECTIONS== | |||
===CHASSIS=== | |||
====CASTERS & FLOOR LOCK ==== | |||
[[File:IOP-050 BTC (03-29-10)-22.jpg|1000px|border]] | |||
[[File:IOP-050 BTC (03-29-10)-23.jpg|1000px|border]] | |||
====VECTOR BRAKE ==== | |||
[[File:IOP-050 BTC (03-29-10)-24.jpg|1000px|border]] | |||
[[File:IOP-050 BTC (03-29-10)-25.jpg|1000px|border]] | |||
[[File:IOP-050 BTC (03-29-10)-26.jpg|1000px|border]] | |||
[[File:IOP-050 BTC (03-29-10)-27.jpg|1000px|border]] | |||
==== SPROCKETS & SHAFTS ==== | |||
[[File:IOP-050 BTC (03-29-10)-28.jpg|1000px|border]] | |||
[[File:IOP-050 BTC (03-29-10)-29.jpg|1000px|border]] | |||
==== BEARINGS & SPROCKETS ==== | |||
[[File:IOP-050 BTC (03-29-10)-30.jpg|1000px|border]] | |||
[[File:IOP-050 BTC (03-29-10)-31.jpg|1000px|border]] | |||
==== ARM & CHAIN ATTACHMENT ==== | |||
[[File:IOP-050 BTC (03-29-10)-32.jpg|1000px|border]] | |||
[[File:IOP-050 BTC (03-29-10)-33.jpg|1000px|border]] | |||
==== CAM FOLLOWERS ==== | |||
[[File:IOP-050 BTC (03-29-10)-34.jpg|1000px|border]] | |||
[[File:IOP-050 BTC (03-29-10)-35.jpg|1000px|border]] | |||
==== EQUALIZATION ==== | |||
[[File:IOP-050 BTC (03-29-10)-36.jpg|1000px|border]] | |||
[[File:IOP-050 BTC (03-29-10)-37.jpg|1000px|border]] | |||
==== ROLLERS & BATTERY STOP ==== | |||
[[File:IOP-050 BTC (03-29-10)-38.jpg|1000px|border]] | |||
[[File:IOP-050 BTC (03-29-10)-39.jpg|1000px|border]] | |||
==== PRIMARY GUARDING ==== | |||
[[File:IOP-050 BTC (03-29-10)-40.jpg|1000px|border]] | |||
[[File:IOP-050 BTC (03-29-10)-41.jpg|1000px|border]] | |||
[[File:IOP-050 BTC (03-29-10)-42.jpg|1000px|border]] | |||
[[File:IOP-050 BTC (03-29-10)-43.jpg|1000px|border]] | |||
==== LABELS & DECALS ==== | |||
[[File:IOP-050 BTC (03-29-10)-44.jpg|1000px|border]] | |||
[[File:IOP-050 BTC (03-29-10)-45.jpg|1000px|border]] | |||
===EXTRACTOR ARM === | |||
==== WINCH ==== | |||
[[File:IOP-050 BTC (03-29-10)-48.jpg|500px|border]] | |||
[[File:IOP-050 BTC (03-29-10)-49.jpg|500px|border]] | |||
==== EXTRACTOR ARM ==== | |||
[[File:IOP-050 BTC (03-29-10)-50.jpg|500px|border]] | |||
[[File:IOP-050 BTC (03-29-10)-51.jpg|500px|border]] | |||
=== HYDRAULICS === | |||
==== POWER UNIT==== | |||
[[File:IOP-050 BTC (03-29-10)-54.jpg|500px|border]] | |||
[[File:IOP-050 BTC (03-29-10)-55.jpg|500px|border]] | |||
==== EXTRACTOR ARM MOTOR==== | |||
[[File:IOP-050 BTC (03-29-10)-56.jpg|500px|border]] | |||
[[File:IOP-050 BTC (03-29-10)-57.jpg|500px|border]] | |||
==== CONTROL VALVES==== | |||
[[File:IOP-050 BTC (03-29-10)-58.jpg|500px|border]] | |||
[[File:IOP-050 BTC (03-29-10)-59.jpg|500px|border]] | |||
==== PILOT-TO-OPEN VALVE==== | |||
[[File:IOP-050 BTC (03-29-10)-60.jpg|500px|border]] | |||
[[File:IOP-050 BTC (03-29-10)-61.jpg|500px|border]] | |||
==== HOSES==== | |||
[[File:IOP-050 BTC (03-29-10)-62.jpg|500px|border]] | |||
[[File:IOP-050 BTC (03-29-10)-63.jpg|500px|border]] | |||
==== MANUAL JACK ==== | |||
[[File:IOP-050 BTC (03-29-10)-64.jpg|500px|border]] | |||
[[File:IOP-050 BTC (03-29-10)-65.jpg|500px|border]] | |||
==== MANUAL JACK REPAIR PARTS ==== | |||
[[File:IOP-050 BTC (03-29-10)-66.jpg|500px|border]] | |||
[[File:IOP-050 BTC (03-29-10)-67.jpg|500px|border]] | |||
==== HYDRAULIC CYLINDER ==== | |||
[[File:IOP-050 BTC (03-29-10)-68.jpg|500px|border]] | |||
[[File:IOP-050 BTC (03-29-10)-69.jpg|500px|border]] | |||
[[File:IOP-050 BTC (03-29-10)-70.jpg|500px|border]] | |||
[[File:IOP-050 BTC (03-29-10)-71.jpg|500px|border]] | |||
[[File:IOP-050 BTC (03-29-10)-72.jpg|500px|border]] | |||
=== ELECTRICAL === | |||
==== BATTERY & CABLES==== | |||
[[File:IOP-050 BTC (03-29-10)-74.jpg|500px|border]] | |||
[[File:IOP-050 BTC (03-29-10)-75.jpg|500px|border]] | |||
==== OPERATOR CONSOLE==== | |||
[[File:IOP-050 BTC (03-29-10)-76.jpg|500px|border]] | |||
[[File:IOP-050 BTC (03-29-10)-77.jpg|500px|border]] | |||
[[File:IOP-050 BTC (03-29-10)-78.jpg|500px|border]] | |||
[[File:IOP-050 BTC (03-29-10)-79.jpg|500px|border]] | |||
==STANDARD OPTIONS== | |||
=== RUBBER BUMPERS === | |||
[[File:IOP-050 BTC (03-29-10)-82.jpg|500px|border]] | |||
[[File:IOP-050 BTC (03-29-10)-83.jpg|500px|border]] | |||
=== TRACK MOUNT === | |||
[[File:IOP-050 BTC (03-29-10)-84.jpg|500px|border]] | |||
[[File:IOP-050 BTC (03-29-10)-85.jpg|500px|border]] | |||
=== PUSH ARM EXTENSION === | |||
[[File:IOP-050 BTC (03-29-10)-86.jpg|500px|border]] | |||
[[File:IOP-050 BTC (03-29-10)-87.jpg|500px|border]] | |||
=== COMPARTMENT EXTENSION === | |||
[[File:IOP-050 BTC (03-29-10)-88.jpg|500px|border]] | |||
[[File:IOP-050 BTC (03-29-10)-89.jpg|500px|border]] | |||
=== SECONDARY GUARDING === | |||
[[File:IOP-050 BTC (03-29-10)-90.jpg|500px|border]] | |||
[[File:IOP-050 BTC (03-29-10)-91.jpg|500px|border]] | |||
=== VACUUM SWITCH === | |||
[[File:IOP-050 BTC (03-29-10)-92.jpg|500px|border]] | |||
[[File:IOP-050 BTC (03-29-10)-93.jpg|500px|border]] | |||
===VACUUM PUMP === | |||
[[File:IOP-050 BTC (03-29-10)-94.jpg|500px|border]] | |||
[[File:IOP-050 BTC (03-29-10)-95.jpg|500px|border]] | |||
===VACUUM ARM === | |||
[[File:IOP-050 BTC (03-29-10)-96.jpg|500px|border]] | |||
[[File:IOP-050 BTC (03-29-10)-97.jpg|500px|border]] | |||
=== SELF CONTAINED CHARGER === | |||
[[File:IOP-050 BTC (03-29-10)-98.jpg|500px|border]] | |||
[[File:IOP-050 BTC (03-29-10)-99.jpg|500px|border]] | |||
== PARTS KITS == | |||
[[File:IOP-050-BTC-(03-29-10)-102.jpg|500px|border]] | |||
[[File:IOP-050 BTC (03-29-10)-103.jpg|500px|border]] | |||
[[File:IOP-050 BTC (03-29-10)-104.jpg|500px|border]] | |||
[[File:IOP-050 BTC (03-29-10)-105.jpg|500px|border]] | |||
[[File:IOP-050 BTC (03-29-10)-106.jpg|500px|border]] | |||
[[File:IOP-050 BTC (03-29-10)-107.jpg|500px|border]] | |||
[[File:IOP-050 BTC (03-29-10)-108.jpg|500px|border]] | |||
[[File:IOP-050 BTC (03-29-10)-109.jpg|500px|border]] | |||
[[File:IOP-050 BTC (03-29-10)-110.jpg|500px|border]] | |||
[[File:IOP-050-BTC-(03-29-10)-111.jpg|500px|border]] | |||
[[File:IOP-050 BTC (03-29-10)-112.jpg|500px|border]] | |||
[[File:IOP-050 BTC (03-29-10)-113.jpg|500px|border]] | |||
[[File:IOP-050 BTC (03-29-10)-114.jpg|500px|border]] | |||
[[File:IOP-050 BTC (03-29-10)-115.jpg|500px|border]] | |||
== STATEMENT OF WARRANTY AND LIABILITY == | |||
'''''STATEMENT OF WARRANTY AND LIABILITY''''' | |||
'''Battery Handling Systems, Inc'''., or its subsidiary that sells the equipment ('''BHS''') warrants to the original purchaser of its equipment, that the equipment will be free from defects in material and workmanship under normal and proper use, operation and maintenance for a period of 13 months from date of shipment to the original purchaser with respect to: frames, weldments, electric drives, motors (except brushes), motor driven pumps, valves, and drive wheel assemblies (except wheels). | |||
The above warranty will remain in effect with respect to all other parts for a period of ninety (90) days after shipment. Bulbs, fuses and filters are not warranted unless found to be defective prior to use or ninety (90) days after shipment, whichever occurs first. | |||
'''BHS''' will, at its option, either provide parts and labor to repair or replace, or grant a credit or refund of the purchase price of, any equipment or part which is determined by BHS to be defective within the above mentioned warranty period, provided BHS’ procedures for warranty claims are followed. These procedures are set forth on the reverse side hereof and are also available upon request. Repaired or replacement equipment and parts will carry the foregoing warranty for the remainder of the original warranty period or ninety (90) days from the date of shipment, whichever is longer. | |||
'''BHS''' will also cover normal ground freight charges such as ground UPS, common carrier, etc. The cost of any express delivery, if requested, will be the sole responsibility of the purchaser, and the purchaser agrees to provide its account number with its preferred carrier to '''BHS''' or to pay the entire cost of express delivery as a condition of '''BHS'''’ provision of such express delivery. Unless authorized in writing by '''BHS''', the foregoing warranty does not cover the cost of removal or reinstallation (or the cost of other activities ancillary thereto), the cost of which will be borne solely by the purchaser. | |||
A claimed defect must be discovered during the applicable warranty period, and notice of any claimed defect must be reported immediately to '''BHS''' or an authorized dealer prior to repair, replacement or refund or credit in accordance with the '''BHS''' warranty and warranty procedures, but in no event more than thirty (30) days after discovery of the claimed defect. | |||
'''BHS'''’ warranty does not cover incidents of abuse, misuse, accidents, overloading, improper installation, repair or maintenance (other than by '''BHS'''), or application of products not in accordance with the instruction manual and product application bulletins. BHS’ warranty does not cover incidents or defects where the equipment has been modified or used in conjunction with other products without the prior written approval of '''BHS'''. | |||
This warranty does not cover accessories and attachments not manufactured by '''BHS'''. The original manufacturer’s warranty, if any, for such accessories or attachments takes precedence and all claims shall be directed to their respective manufacturers. | |||
'''ANY LITIGATION TO ENFORCE THE FOREGOING WARRANTY MUST BE COMMENCED NO LATER THAN ONE (1) YEAR AFTER DISCOVERY REASONABLY SHOULD HAVE BEEN MADE OF ANY FACTS OR OTHER INFORMATION SUGGESTING THE EXISTENCE OF A PRODUCT FAILURE OR A PRODUCT DEFECT. THE WARRANTY SET FORTH HEREIN IS THE COMPLETE AND ENTIRE WARRANTY MADE BY BHS, AND THERE ARE NO OTHER WARRANTIES, EXPRESS OR IMPLIED, WHETHER OF MERCHANTABILITY, FITNESS FOR A PARTICULAR PURPOSE, NON-INFRINGEMENT OR OTHERWISE, MADE BY BHS. NO PERSON IS AUTHORIZED TO MAKE ANY OTHER OR ADDITIONAL WARRANTY ON BEHALF OF BHS. THE RIGHT TO REPAIR, REPLACEMENT OR CREDIT/REFUND, AS SET FORTH HEREIN, IS THE SOLE AND EXCLUSIVE REMEDY FOR BREACH OF THE ABOVE WARRANTY. BHS SHALL NOT BE LIABLE FOR CHARGES OR EXPENSES OF ANY NATURE UNDER THE FOREGOING WARRANTY INCURRED WITHOUT BHS’ CONSENT. FURTHERMORE, UNDER NO CIRCUMSTANCES, REGARDLESS OF THE FORM OF THE CLAIM OR CAUSE OF ACTION (WHETHER IN WARRANTY, CONTRACT, INFRINGEMENT, NEGLIGENCE, STRICT LIABILITY, OTHER TORT, OR OTHERWISE), WILL BHS BE LIABLE FOR: (A) INCIDENTAL DAMAGES (EXCEPT AS SPECIFICALLY PROVIDED FOR ABOVE), OR CONSEQUENTIAL, INDIRECT, SPECIAL OR PUNITIVE DAMAGES; OR (B) DIRECT DAMAGES IN EXCESS OF THE PURCHASE PRICE OF THE BHS EQUIPMENT GIVING RISE TO THE CLAIM OR CAUSE OF ACTION. “CONSEQUENTIAL DAMAGES” INCLUDE, WITHOUT LIMITATION, LOST PROFITS, BUSINESS INTERRUPTION DAMAGES, LOSS OF USE DAMAGES AND DAMAGE TO REPUTATION OR GOODWILL.''' | |||
== WARRANTY PROCEDURES== | |||
'''''WARRANTY PROCEDURES''''' | |||
Please refer to '''Battery Handling Systems, Inc'''.’s Statement of Warranty and Liability (which is set forth on the reverse side hereof or available upon request) for a complete description of '''BHS'''’ warranty. In the event of conflict between '''BHS'''’ warranty and these procedures, the warranty will control. | |||
'''Battery Handling Systems, Inc.'''’s warranty policy is intended to protect original purchasers who submit valid claims, as well as to identify and eliminate claims where product failure is the result of customer abuse, neglect or misapplication. | |||
'''''Step 1: Gather Information''''' | |||
The following information must be provided immediately. | |||
*A description of the product that includes, at a minimum, the model, serial number, and hour meter reading (if applicable). | |||
*Customer name, location, and contact information including phone number. | |||
*Installation date, installation provider (dealer), servicing dealer, and selling dealer. | |||
*Any prior repairs, modification, or adjustments. | |||
'''''Step 2: Contact BHS''''' | |||
Contact '''BHS''' at: | |||
Toll Free: 1.877.247.4968 | |||
Local: 1.314.890.0953 | |||
Fax: 1.314.423.5948 | |||
Email: service@bhs1.com | |||
'''''Step 3: Authorization''''' | |||
BHS will authorize further evaluation, repair, or replacement. A warranty claim form indicating '''BHS''' prior authorization for any such action will be issued to claimant. The completed warranty claim form must be submitted with any request for warranty credit. | |||
'''''Step 4: Request RGA Number''''' | |||
*Suspected defective parts must be returned to BHS under an issued Return Goods Authorization (RGA) number. | |||
*BHS will specify the proper disposition of the parts through the issue of an RGA number. | |||
*Return shipment method will also be specified at time of RGA issue. RGAs are good for thirty (30) days from date issued; no credit will be issued for items returned after the RGA has expired. | |||
'''''Step 5: Claim Warranty''''' | |||
*Submit Warranty Claim forms and supporting documents to: Battery Handling Systems, Inc. | |||
P.O. Box 28990 St. Louis, MO 63132 | |||
Fax: 1.314.423.5948 | |||
Email: service@bhs1.com | |||
'''Step | *Labor allowance hours are determined by our engineering staff. | ||
*Actual travel time, labor time, and parts costs must be indicated as separate items as provided on the form. | |||
'''''Step 6: BHS will process warranty claim and notify purchaser of final disposition.''''' | |||
1.877.BHS-4YOU | |||
www.bhs1.com | |||
Revision as of 13:31, 7 August 2019
TP-619 - SAFETY AND DE-ENERGIZATION PROCEDURES
Register your equipment with BHS Optima, BHS's free app.
GENERAL INFORMATION
The Battery Transfer Carriage (BTC) is used to remove large batteries from electric industrial trucks.
The BTC is either freely maneuvered on casters by a person at the rear of the BTC by pushing/pulling on the handles of the unit or sideways along a designated travel path by a person at either side of the unit pushing/pulling on a handle of the unit.
The BTC can be one of a possible three operating types / options:
- Fully Mechanical Unit - The unit is raised and lowered using a manual, hydraulic jack located at the rear of the unit. The battery is manipulated by either A) a hand winch located at the rear of the unit that is attached to the battery and retracted, pulling the battery onto the unit while physically pushing the battery by hand off of the unit or B) an extractor arm that moves inward and outward using a hand wheel located on the left, rear of the unit to push or pull the battery on and off the unit.
- Fully Electric Unit - The unit has a fully enclosed, self contained, electrically powered, hydraulic power unit located on the right, rear of the unit. Power is supplied by a 12VDC battery located on the left, rear of the unit. The power unit provides power to raise the unit using a hydraulic cylinder and power to move the extractor arm inward and outward using a hydraulic motor. The lift and extraction functions are controlled by individual manual lever valves located within the power unit housing. This unit may be equipped with an optional vacuum extraction which has a vacuum pump located between the push handles at the rear of the unit powered by the DC battery.
- Partially Electric Unit - The unit is a combination of either mechanical extraction and electric lift or electric extraction and mechanical lift. Operation of this unit is a combination of each type listed above.
GENERAL SAFETY
- Read and understand all instructions and warnings before using or servicing this equipment.
- Keep these instructions for future reference.
- Battery Transfer Carriage (BTC) units shall only be used indoors in an industrial setting on a hard, nonslip, and level floor without defects including but not limited to holes, gouges, cracks, drains or obstacles comprised of concrete or other suitable industrial material.
- Forces required to operate the BTC vary with weight of the load, floor conditions, and carriage conditions.
- BTC units are not designed to be shipped or transported after initial delivery.
- A licensed structural engineer should be consulted prior to installing a BTC on any building level other than the ground floor.
- Perform system and safety check before operating.
- Failure to follow these instructions and warnings may result in property damage, personal injury or death.
WORK AREA
- Keep work area clean and well lit. Cluttered work areas and poor lighting can lead to accidents.
- Clean up/contain any fl uid spills immediately to prevent slips or falls.
- Be aware of potential hazards when performing any service or maintenance to the unit.
SERVICE & MAINTENANCE
Service personnel shall wear Personal Protective Equipment (PPE) appropriate for the task being performed.
LOCKOUT/TAGOUT
Lockout/tagout the BTC per your corporate policy, if damaged or not functioning properly. Lockout/tagout and de-energize all systems prior to performing any maintenance or service to unit.
LEAD-ACID BATTERIES-EXPLOSION HAZARD
![]()
Do not allow open flames or sparks of any kind near a battery. Highly explosive gas is generated when charging a battery that can remain in battery cells for extended periods of time after charging is complete.
- Always wear appropriate PPE including rubber apron, gloves, boots and full face shield when performing service or maintenance to any lead-acid batteries.
- Do not place metal or other conductive objects on top of battery. Arcing may occur causing damage to the battery and/or serious personal injury or death.
- Use only chargers matching the voltage and amperage of the battery being charged. Overcharging a battery can cause damage to the battery, charger and/or serious personal injury or death.
- Turn off charger before disconnecting battery from charger. Arcing between battery and charger connectors can cause damage to the connectors and/or serious personal injury or death.
HYDRAULIC HAZARD
![]()
AVOID HIGH PRESSURE FLUIDS-Escaping fluid under pressure can penetrate the skin causing serious injury. Relieve pressure before disconnecting hydraulic lines. Tighten all connections before applying pressure. Keep hands and body away from pin holes which eject fluids under high pressure. Use a piece of cardboard or paper to search for leaks. DO NOT use your hand.
Any fluid injected into the skin under high pressure should be considered a serious medical emergency despite an initial normal appearance of the skin. There will be a delayed onset of pain, and serious tissue damage may occur. Medical attention should be sought immediately.
OPERATIONAL SAFETY
OPERATIONAL SAFETY
- Only personnel trained in the proper and safe operation of BTC units may operate or service the BTC.
- Operators shall wear appropriate PPE suitable for working with industrial lead-acid batteries while operating the BTC (see prior page).
- All data plates, warning labels, placards, etc shall be in place and legible at all times. Contact BHS for replacement data plates, warning labels, placards or instructions.
- All users and service personnel shall be familiar with the meaning and risks associated with all data plates, warning labels, etc.
- All operators and service personnel shall be aware of potential crush and shear points while operating or servicing the BTC, including the casters and brakes.
- BTC should be operated in an area with ambient light levels of at least 50 lux.
- Keep hands and arms out of the battery compartment while operating the BTC.
- Engage the battery stop(s) and properly secure the battery prior to transporting the battery.
- Attach the hook and chain (if equipped) to the battery prior to transporting the battery.
- Avoid abrupt changes in direction when transporting a battery in the BTC to prevent loss of the battery and/or loss of control of the BTC.
- Remove BTC from service if damaged, defective, or operating improperly (or becomes such while operating) until repairs can be made to correct any problem(s).
DO’s AND DON’T’s
- DO NOT exceed the maximum capacity of the BTC.
- DO NOT modify or fit the BTC with attachments without prior, written approval from BHS.
- DO NOT perform any maintenance or service to the BTC with a battery loaded on the BTC.
- DO NOT allow anyone to ride in or on the BTC.
- DO NOT operate the BTC with any guard or cover removed unless required for maintenance or repair.
- DO NOT travel with the stop bar in the raised position.
- DO NOT lower the inside frame on any person or object.
- Disconnect the battery (if equipped) before attempting to perform service or maintenance to the BTC.
- DO NOT use the BTC in a manner for which it is not intended. Some examples of prohibited use are but not limited to:
           >>As a scooter or to transport people
           >>As a vehicle jack
           >>To lift loads greater than its rated load capacity
           >>Where unintentional movement may exist
           >>Having direct contact with foodstuff
           >>In a potentially explosive atmosphere
DE-ENERGIZATION
BTC/BTC-MPP:
- Turn the pump release handle counterclockwise to lower the inner carriage and release hydraulic pressure. See Figure 1
_FIGURE_1.JPG)
FIGURE 1
BTC-MPPEL/MPPEE/MPPAE:
- Unplug the battery charger (if equipped).
- Disconnect the positive cable from the battery post. Secure the positive cable so it cannot contact the positive battery post. See Figure 2.
- Cycle the manual valves several times to relieve stored hydraulic pressure. See Figure 3.

FIGURE 2

FIGURE 3
LABELS & PLACARDS
File:IOP-050-BTC-(03-29-10)-8-card.jpg
GENERAL INFORMATION
MODEL NUMBER & OPTIONS
-9.jpg)
SPECIFICATIONS
-10.jpg)
INSTALLATION
The following describes the basic installation procedures for the BTC battery transfer carriage.
- Once the carriage has been removed from the shipping 1. pallet, the floor lock(s) must be attached. The floor lock is attached to the lower frame on the operator side below the lift cylinder with the supplied hardware. See Figures 1 - 3. Notes: BTC-30 units have two floor locks. The floor lock is only to be used when parking the carriage when not in use.
- Ensure that the lift cylinder is properly aligned with the hole located on the underside of the inner frame. This will ensure safe, even lifting. See Figure 4.
- Winch units only: Unbolt the winch support and reposition it toward the rear of the unit. See Figure 5.
- Electric units only:Connect the positive cable to the positive terminal of the battery. See Figure 6. Note: The battery must be disconnected prior to charging.
- The carriage is now ready for use.
FIGURE 1
image--040.jpg)
FIGURE 2
image--041.jpg)
FIGURE 3
image--042.jpg)
FIGURE 4

FIGURE 5
image--043.jpg)
FIGURE 6
OPERATING CONTROLS
The following is a brief operational overview of the BTC.
-
EXTRACTION CONTROLS
- Winch Extraction - Rotate the winch handle counterclockwise to extend the winch strap and rotate the winch handle clockwise to retract the winch strap. Winch direction is changed by switching the lever at the rear of the winch. See Figure 7
- Mechanical Extraction - Turn the hand wheel counterclockwise to extend the extractor arm toward the lift truck or battery stand and clockwise to retract the extractor arm. See Figure 8. Note: The extractor arm latch must be raised to move the arm when fully retracted. See Figure 9.
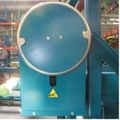
FIGURE 8
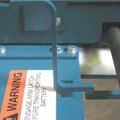
FIGURE 9
- Electric Extraction - With the green power button depressed, push the extraction valve handle to the right to extend the extractor arm toward the lift truck or battery stand and push the valve handle to the left to retract the extractor arm. See Figure 10.
- Vacuum (if equipped) - Pull up the vacuum switch to energize the vacuum pump and push down to de-energize the vacuum pump. LIFT CONTROLS
- Mechanical Lift - Insert the jack handle into the jack handle socket and pump the jack handle up and down to raise the inner carriage. To lower the inner carriage, slowly turn the release handle located at the base of the manual jack counterclockwise. Turn the release handle clockwise to stop lowering the inner carriage. See Figures 11 & 12.
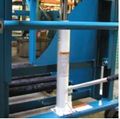
FIGURE 11
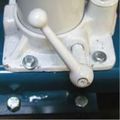
FIGURE 12
- Electric Lift - With the green power button depressed, push the lift valve handle to the left to raise the inner carriage and push the valve handle to the right to lower the inner carriage. See Figure 13.
- Vector Brakes - The vector brakes are used when transferring batteries from the BTC to the industrial truck or battery stand. To engage the vector brake, lift the release handle up and slide it forward allowing the vector brake to lower to the floor. To disengage, lift the release handle up until the notch in the release handle is allowed to move rearward, locking the brake in the raised position. See Figures 14 & 15.
- Floor Lock - The floor lock is to be used any time the BTC is left unattended. DO NOT use the floor lock during the change out process. To engage the fl oor lock, press down on the pedal with your foot. To disengage, press either of the two release tabs on the side of the floor lock with your foot. See Figure 16.
- Extractor Arm - Verify proper arm travel by slowly moving the extractor arm fully in and out of the battery compartment.
- Lift - Verify proper lift by slowly raising and lowering the inner carriage through the entire lift range.
- Vector Brakes - Verify operation by engaging and disengaging the vector brake to ensure smooth operation and verify complete contact of the brake pad with the floor. While engaged, carefully pull rearward on the cart to ensure proper engagement of the vector brakes. Note: When unloaded, it is normal for the front casters of the carriage to lift off the floor as the vector brakes engage.
- Floor Lock - Verify operation by engaging the floor lock and ensure the carriage cannot move when pushed or pulled with moderate force.
- Vacuum (if equipped) - Verify the vacuum pump energizes and there is suction at the vacuum port of the vacuum cup.
image--046.jpg)
FIGURE 7
image--048.jpg)
image--049.jpg)
image--047.jpg)
FIGURE 10
image--051.jpg)
image--052.jpg)
-8-card.jpg)
image--039.jpg)
image--050.jpg)
FIGURE 13
BRAKES
image--055.jpg)
FIGURE 14
image--054.jpg)
FIGURE 15
image--056.jpg)
FIGURE 16
OPERATIONAL TEST
After the initial installation has been completed or any service to the unit has been performed, an operational test should be conducted to ensure proper functions of the unit prior to returning the BTC back into service.
OPERATING INSTRUCTIONS
The following instructions will guide you through the basic steps necessary to operate and change batteries with a BTC.
Operators must be equipped with all necessary PPE and be properly trained in handling industrial lead-acid lift truck batteries.
- If not already in place, position industrial truck (pallet or lift truck) which requires a battery change in the appropriate staging area.
- Disconnect the battery leads and remove any battery restraints.
- Move the BTC into position such that the roller compartment of the BTC is aligned with the battery compartment of the industrial truck.
- Verify the battery safety stop at the end of the BTC roller bed is in the down position.
- Adjust the vertical height of the BTC battery compartment to the battery compartment of the industrial truck or slightly higher. [DO NOT exceed 1/4" difference.].
- Once the proper height is achieved, the extractor arm can be moved toward the lift truck battery.
Hook and Chain - Stop the extractor arm approximately 3" - 4" from the battery.
Vacuum Extraction - Bring the vacuum cup in contact with the battery. DO NOT force the extractor arm into the battery once contact is made. - For hook and chain units, attach the hook securely through the lifting eye of the battery and ensure full engagement. See Figure 17. For vacuum units, energize the vacuum.
- Slowly begin removing the battery from the industrial truck battery compartment while inspecting the vertical alignment of both battery compartments. If vertical adjustment is required, disengage the vacuum cup (if equipped) prior to adjusting the height of the BTC.
- Once the battery is entirely inside the BTC battery compartment, move the battery safety stop to the upright position. For electric units, secure the battery for transport by moving the battery forward using the extractor arm to “pin” the battery between the extractor arm and battery stop to prevent the battery from rocking front to back. If equipped, turn off the vacuum.
- The battery may now be transported to the charging area.
Note: When possible, always push carriage so as to not create a hazard should you slip while pulling the carriage. Batteries are heavy and could cause personal injury under such conditions. - Align the BTC with an open roller compartment in the battery charging area.
- Adjust the vertical height as needed for alignment with the battery stand.
- Engage both vector brakes.
- Lower the battery safety stop at the front of the carriage.
- Slowly move the battery from the BTC into the battery stand. For vacuum equipped units, it is not necessary to energize the vacuum for this step.
- After transfer, raise the battery stop on the stand and disconnect the hook from the battery. DO NOT force the extractor arm into the battery after the battery is completely in the stand.
- Reposition the BTC at the location of the newly charged battery to be installed in the lift truck.
- The above process can be used to remove a battery from the roller stand to be installed into the industrial truck.
- After completing battery changes, the floor lock(s) should be engaged prior to leaving the BTC unattended. As with all material handling equipment, the transfer carriage should be inspected prior to each use for any visual damage. It should also undergo a routine inspection by trained maintenance personnel to verify and maintain the load capacity of the unit.
image--058.jpg)
FIGURE 17
MANUAL UNLOADING
Lockout/tagout and de-energize all equipment prior to manually unloading any battery.
In the event of power loss or an operational malfunction of the BTC not allowing the battery to be unloaded using normal operating procedures, it is recommended the battery be removed from the BTC using certifi ed and approved vertical extraction methods and devices.
![]()
Read, understand and observe all safety warnings and procedures related to the vertical extraction device(s) being used.
If certified and approved vertical extraction methods and/or devices are not available and the unit’s casters and lift/lower functions operate normally, the battery may be unloaded by hand as follows:
1. Move the BTC into position such that the roller compartment of the BTC is aligned with an empty battery stand roller compartment. Verify the battery safety stop(s) of the empty roller compartment is in the down position.
2. Engage the vector brakes on both sides of the BTC.
3. Adjust the vertical height of the BTC roller compartment with the empty roller compartment or slightly higher. DO NOT exceed 1/4” difference. Verify the battery safety stop(s) at the end of the BTC roller bed is in the down position.
4. Carefully push the battery by hand from the BTC into the battery stand. Move the battery safety stop(s) of the battery stand to the up position.
![]()
Hand position should be carefully selected to prevent accidental crushing. Maintain a secure footing to prevent slips, trips or falls.
2019-07-25_at_2.23.13_PM.jpg)
SERVICE & MAINTENANCE
The following items are recommended by the factory to have on hand for BTC models to minimize any downtime due to minor breakdown that may occur under normal operating conditions.
-18.jpg)
Use only BHS approved replacement parts.
BHS recommends that a full maintenance inspection report similar to the one provided be done at least once a month.
Any parts found to be excessively worn or damaged should promptly be replaced unless said parts pose a safety risk to the operator and/or extractor, in which case the unit should be removed from service until the problem(s) are remedied (See Operator’s Daily Checklist.)
“READY” STATUS INDICATOR LIGHT
BTC electric motors are protected by an internal thermal switch. If the motor gets too hot, the switch will open so the motor will not operate. When this happens the green light will not be lit. This switch will reset automatically and the light will be lit again when the motor has cooled sufficiently.
The unit is “Ready” for use when the green light is lit. If the light is not lit, check the following:
1. Verify the battery voltage is the same as listed on the serial plate.
2. Verify the correct polarity at the light terminals.
If both these items are correct, then the thermal switch may have opened. Let the motor cool for about 30 minutes and check the green light again. If the green light does not come on, call for service.
HYDRAULIC SYSTEM
For electric units, the reservoir should be fi lled within 1" of the top of the reservoir with approximately 0.8 Gal / 3.0 L of Chevron hydraulic oil AW ISO 32 or equivalent ISO 32 grade hydraulic oil with anti-wear additives and foam suppressant.
NOTE: It is not necessary to bleed the system after filling the unit.
DISPOSAL OF WASTE MATERIAL
Dispose of all fluids and waste according to local regulations.
-19.jpg)
PARTS SECTIONS
CHASSIS
CASTERS & FLOOR LOCK
-22.jpg)
-23.jpg)
VECTOR BRAKE
-24.jpg)
-25.jpg)
-26.jpg)
-27.jpg)
SPROCKETS & SHAFTS
-28.jpg)
-29.jpg)
BEARINGS & SPROCKETS
-30.jpg)
-31.jpg)
ARM & CHAIN ATTACHMENT
-32.jpg)
-33.jpg)
CAM FOLLOWERS
-34.jpg)
-35.jpg)
EQUALIZATION
-36.jpg)
-37.jpg)
ROLLERS & BATTERY STOP
-38.jpg)
-39.jpg)
PRIMARY GUARDING
-40.jpg)
-41.jpg)
-42.jpg)
-43.jpg)
LABELS & DECALS
-44.jpg)
-45.jpg)
EXTRACTOR ARM
WINCH
-48.jpg)
-49.jpg)
EXTRACTOR ARM
-50.jpg)
-51.jpg)
HYDRAULICS
POWER UNIT
-54.jpg)
-55.jpg)
EXTRACTOR ARM MOTOR
-56.jpg)
-57.jpg)
CONTROL VALVES
-58.jpg)
-59.jpg)
PILOT-TO-OPEN VALVE
-60.jpg)
-61.jpg)
HOSES
-62.jpg)
-63.jpg)
MANUAL JACK
-64.jpg)
-65.jpg)
MANUAL JACK REPAIR PARTS
-66.jpg)
-67.jpg)
HYDRAULIC CYLINDER
-68.jpg)
-69.jpg)
-70.jpg)
-71.jpg)
-72.jpg)
ELECTRICAL
BATTERY & CABLES
-74.jpg)
-75.jpg)
OPERATOR CONSOLE
-76.jpg)
-77.jpg)
-78.jpg)
-79.jpg)
STANDARD OPTIONS
RUBBER BUMPERS
-82.jpg)
-83.jpg)
TRACK MOUNT
-84.jpg)
-85.jpg)
PUSH ARM EXTENSION
-86.jpg)
-87.jpg)
COMPARTMENT EXTENSION
-88.jpg)
-89.jpg)
SECONDARY GUARDING
-90.jpg)
-91.jpg)
VACUUM SWITCH
-92.jpg)
-93.jpg)
VACUUM PUMP
-94.jpg)
-95.jpg)
VACUUM ARM
-96.jpg)
-97.jpg)
SELF CONTAINED CHARGER
-98.jpg)
-99.jpg)
PARTS KITS
-102.jpg)
-103.jpg)
-104.jpg)
-105.jpg)
-106.jpg)
-107.jpg)
-108.jpg)
-109.jpg)
-110.jpg)
-111.jpg)
-112.jpg)
-113.jpg)
-114.jpg)
-115.jpg)
STATEMENT OF WARRANTY AND LIABILITY
STATEMENT OF WARRANTY AND LIABILITY
Battery Handling Systems, Inc., or its subsidiary that sells the equipment (BHS) warrants to the original purchaser of its equipment, that the equipment will be free from defects in material and workmanship under normal and proper use, operation and maintenance for a period of 13 months from date of shipment to the original purchaser with respect to: frames, weldments, electric drives, motors (except brushes), motor driven pumps, valves, and drive wheel assemblies (except wheels).
The above warranty will remain in effect with respect to all other parts for a period of ninety (90) days after shipment. Bulbs, fuses and filters are not warranted unless found to be defective prior to use or ninety (90) days after shipment, whichever occurs first.
BHS will, at its option, either provide parts and labor to repair or replace, or grant a credit or refund of the purchase price of, any equipment or part which is determined by BHS to be defective within the above mentioned warranty period, provided BHS’ procedures for warranty claims are followed. These procedures are set forth on the reverse side hereof and are also available upon request. Repaired or replacement equipment and parts will carry the foregoing warranty for the remainder of the original warranty period or ninety (90) days from the date of shipment, whichever is longer.
BHS will also cover normal ground freight charges such as ground UPS, common carrier, etc. The cost of any express delivery, if requested, will be the sole responsibility of the purchaser, and the purchaser agrees to provide its account number with its preferred carrier to BHS or to pay the entire cost of express delivery as a condition of BHS’ provision of such express delivery. Unless authorized in writing by BHS, the foregoing warranty does not cover the cost of removal or reinstallation (or the cost of other activities ancillary thereto), the cost of which will be borne solely by the purchaser.
A claimed defect must be discovered during the applicable warranty period, and notice of any claimed defect must be reported immediately to BHS or an authorized dealer prior to repair, replacement or refund or credit in accordance with the BHS warranty and warranty procedures, but in no event more than thirty (30) days after discovery of the claimed defect.
BHS’ warranty does not cover incidents of abuse, misuse, accidents, overloading, improper installation, repair or maintenance (other than by BHS), or application of products not in accordance with the instruction manual and product application bulletins. BHS’ warranty does not cover incidents or defects where the equipment has been modified or used in conjunction with other products without the prior written approval of BHS.
This warranty does not cover accessories and attachments not manufactured by BHS. The original manufacturer’s warranty, if any, for such accessories or attachments takes precedence and all claims shall be directed to their respective manufacturers.
ANY LITIGATION TO ENFORCE THE FOREGOING WARRANTY MUST BE COMMENCED NO LATER THAN ONE (1) YEAR AFTER DISCOVERY REASONABLY SHOULD HAVE BEEN MADE OF ANY FACTS OR OTHER INFORMATION SUGGESTING THE EXISTENCE OF A PRODUCT FAILURE OR A PRODUCT DEFECT. THE WARRANTY SET FORTH HEREIN IS THE COMPLETE AND ENTIRE WARRANTY MADE BY BHS, AND THERE ARE NO OTHER WARRANTIES, EXPRESS OR IMPLIED, WHETHER OF MERCHANTABILITY, FITNESS FOR A PARTICULAR PURPOSE, NON-INFRINGEMENT OR OTHERWISE, MADE BY BHS. NO PERSON IS AUTHORIZED TO MAKE ANY OTHER OR ADDITIONAL WARRANTY ON BEHALF OF BHS. THE RIGHT TO REPAIR, REPLACEMENT OR CREDIT/REFUND, AS SET FORTH HEREIN, IS THE SOLE AND EXCLUSIVE REMEDY FOR BREACH OF THE ABOVE WARRANTY. BHS SHALL NOT BE LIABLE FOR CHARGES OR EXPENSES OF ANY NATURE UNDER THE FOREGOING WARRANTY INCURRED WITHOUT BHS’ CONSENT. FURTHERMORE, UNDER NO CIRCUMSTANCES, REGARDLESS OF THE FORM OF THE CLAIM OR CAUSE OF ACTION (WHETHER IN WARRANTY, CONTRACT, INFRINGEMENT, NEGLIGENCE, STRICT LIABILITY, OTHER TORT, OR OTHERWISE), WILL BHS BE LIABLE FOR: (A) INCIDENTAL DAMAGES (EXCEPT AS SPECIFICALLY PROVIDED FOR ABOVE), OR CONSEQUENTIAL, INDIRECT, SPECIAL OR PUNITIVE DAMAGES; OR (B) DIRECT DAMAGES IN EXCESS OF THE PURCHASE PRICE OF THE BHS EQUIPMENT GIVING RISE TO THE CLAIM OR CAUSE OF ACTION. “CONSEQUENTIAL DAMAGES” INCLUDE, WITHOUT LIMITATION, LOST PROFITS, BUSINESS INTERRUPTION DAMAGES, LOSS OF USE DAMAGES AND DAMAGE TO REPUTATION OR GOODWILL.
WARRANTY PROCEDURES
WARRANTY PROCEDURES
Please refer to Battery Handling Systems, Inc.’s Statement of Warranty and Liability (which is set forth on the reverse side hereof or available upon request) for a complete description of BHS’ warranty. In the event of conflict between BHS’ warranty and these procedures, the warranty will control.
Battery Handling Systems, Inc.’s warranty policy is intended to protect original purchasers who submit valid claims, as well as to identify and eliminate claims where product failure is the result of customer abuse, neglect or misapplication.
Step 1: Gather Information The following information must be provided immediately.
- A description of the product that includes, at a minimum, the model, serial number, and hour meter reading (if applicable).
- Customer name, location, and contact information including phone number.
- Installation date, installation provider (dealer), servicing dealer, and selling dealer.
- Any prior repairs, modification, or adjustments.
Step 2: Contact BHS
Contact BHS at: Toll Free: 1.877.247.4968 Local: 1.314.890.0953 Fax: 1.314.423.5948 Email: service@bhs1.com
Step 3: Authorization
BHS will authorize further evaluation, repair, or replacement. A warranty claim form indicating BHS prior authorization for any such action will be issued to claimant. The completed warranty claim form must be submitted with any request for warranty credit.
Step 4: Request RGA Number
- Suspected defective parts must be returned to BHS under an issued Return Goods Authorization (RGA) number.
- BHS will specify the proper disposition of the parts through the issue of an RGA number.
- Return shipment method will also be specified at time of RGA issue. RGAs are good for thirty (30) days from date issued; no credit will be issued for items returned after the RGA has expired.
Step 5: Claim Warranty
- Submit Warranty Claim forms and supporting documents to: Battery Handling Systems, Inc.
P.O. Box 28990 St. Louis, MO 63132
Fax: 1.314.423.5948
Email: service@bhs1.com
- Labor allowance hours are determined by our engineering staff.
- Actual travel time, labor time, and parts costs must be indicated as separate items as provided on the form.
Step 6: BHS will process warranty claim and notify purchaser of final disposition.
1.877.BHS-4YOU
www.bhs1.com