Difference between revisions of "Fleet Tracker Operation Instructions (IOP-FLTIIOT)"
| (69 intermediate revisions by the same user not shown) | |||
| Line 40: | Line 40: | ||
<ol style="list-style-type:upper-alpha"> | <ol style="list-style-type:upper-alpha"> | ||
<li>Scan the charged battery and the source rack slot indicated by Fleet Tracker. </li> | <li>Scan the charged battery and the source rack slot indicated by Fleet Tracker. </li> | ||
<li> | <li>After scanning, move the charged battery onto the extractor and click next to confirm.</li> | ||
</ol> | </ol> | ||
<i>If the battery selected by Fleet Tracker is not available, you can Skip Battery, which will bring up the next available one in the queue. | <i>If the battery selected by Fleet Tracker is not available, you can Skip Battery, which will bring up the next available one in the queue. | ||
Note: The skipped battery will be put ON HOLD. reference chapter 2 section F for Manage Battery holds</i> | Note: The skipped battery will be put ON HOLD. reference chapter 2 section F for Manage Battery holds</i> | ||
<br /> | |||
[[File: | [[File:image011.jpg|800px]] | ||
<li><b>Store depleted battery</b></li> | <li><b>Store depleted battery</b></li> | ||
<ol style="list-style-type:upper-alpha"> | <ol style="list-style-type:upper-alpha"> | ||
<li>Scan the depleted battery and the destination rack slot indicated by the Fleet Tracker.</i> | <li>Scan the depleted battery and the destination rack slot indicated by the Fleet Tracker.</i> | ||
<li>After scanning, move the depleted battery to the rack slot and click next to confirm.</li> | |||
</ol> | </ol> | ||
<i>If the rack slot selected is not available, you can Skip Rack Slot, which will bring up the next available slot | <i>If the rack slot selected is not available, you can Skip Rack Slot, which will bring up the next available slot | ||
NOTE: The skipped rack slot will be marked INACTIVE. Reference chapter 2 section G for Manage Rack Slot Status</i> | NOTE: The skipped rack slot will be marked INACTIVE. Reference chapter 2 section G for Manage Rack Slot Status</i> | ||
[[File:image013.jpg|800px]] | |||
<li><b>Install new battery</b></li> | <li><b>Install new battery</b></li> | ||
<ol style="list-style-type:upper-alpha"> | <ol style="list-style-type:upper-alpha"> | ||
| Line 70: | Line 74: | ||
[[File:image018.jpg|800px]] | [[File:image018.jpg|800px]] | ||
</ol> | |||
This video will demonstrate a battery change out.<br /> | |||
https://vimeo.com/442004589/5547460a3e | |||
https://vimeo.com/442004589/5547460a3e | |||
===Stage Battery (If permission is selected)=== | ===Stage Battery (If permission is selected)=== | ||
[[File:image019.jpg|400px]] | [[File:image019.jpg|400px]] | ||
====Purpose==== | |||
<b>Purpose</b>: Facilities may choose to stage batteries to allow for faster change outs. By having the battery stored in the rack or on the extractor, the next available battery is already selected and ready to install in the truck. | |||
Stage Battery To Staging Rack Slot | Stage Battery To Staging Rack Slot | ||
[[File:image021.jpg|400px]] | [[File:image021.jpg|400px]] | ||
====Procedure==== | |||
<ol> | <ol> | ||
<li>Select Battery</li> | <li><b>Select Battery</b></li> | ||
<ol style="list-style-type:upper-alpha"> | <ol style="list-style-type:upper-alpha"> | ||
<li>Select pool type of battery to stage</li> | <li>Select pool type of battery to stage</li> | ||
| Line 102: | Line 105: | ||
NOTE: The skipped battery will be put ON HOLD. Reference chapter 2 section F for Manage Battery holds</i> | NOTE: The skipped battery will be put ON HOLD. Reference chapter 2 section F for Manage Battery holds</i> | ||
<li>Transfer battery to stage</li> | <li><b>Transfer battery to stage</b></li> | ||
<ol style="list-style-type:upper-alpha"> | <ol style="list-style-type:upper-alpha"> | ||
<li>Store battery in the specified charge rack slot.</li> | <li>Store battery in the specified charge rack slot.</li> | ||
| Line 117: | Line 120: | ||
https://vimeo.com/442005217/6ea6f18e0f | https://vimeo.com/442005217/6ea6f18e0f | ||
<b>Stage Battery to Extractor</b> | |||
<ol> | |||
Stage Battery to Extractor | <li><b>Stage Battery</b></li> | ||
<ol style="list-style-type:upper-alpha"> | <ol style="list-style-type:upper-alpha"> | ||
<li>Select pool type of battery to stage</li> | |||
<li>Then scan the specified battery and location.</li> | |||
</ol> | |||
</ol> | |||
[[File:image031.jpg|800px]] | |||
<i>If the battery selected is not available, you can Skip Battery, which will bring up the next available one in the queue | |||
NOTE: The skipped battery will be put ON HOLD. Reference chapter 2 section F for Manage Battery holds</i> | |||
[[File:image034.jpg|800px]] | |||
The battery is now staged on the extractor and is ready for use when a truck in the same pool type comes in for a battery change. | |||
====Change a battery with a staged battery on the extractor (If permission is selected)==== | ====Change a battery with a staged battery on the extractor (If permission is selected)==== | ||
[[File:image035.jpg|400px]] | |||
<ol> | |||
<li><b>Scan old battery</b></li> | |||
<ol style="list-style-type:upper-alpha"> | <ol style="list-style-type:upper-alpha"> | ||
<li>Scan the battery and truck to change the battery out. </li> | |||
<li>After scanning, move the depleted battery onto the battery extractor and click next to confirm.</li> | |||
</ol> | |||
[[File:image037.jpg|800px]] | |||
<li><b>Install new battery</b></li> | |||
<ol style="list-style-type:upper-alpha"> | |||
<li>Move the charged battery to the truck.</li> | |||
<li>Then, scan the battery and truck and hit next to confirm that it is installed.</li> | |||
</ol> | |||
[[File:image039.jpg|800px]] | |||
<li><b>Store depleted battery</b></li> | |||
<ol style="list-style-type:upper-alpha"> | |||
<li>Scan the depleted battery and the destination rack slot indicated by the Fleet Tracker. </li> | |||
<li>After scanning, move the depleted battery to the rack slot and click next to confirm.</li> | |||
</ol> | |||
<i>If the rack slot selected is not available, you can Skip Rack Slot, which will bring up the next available slot | |||
NOTE: The skipped rack slot will be marked INACTIVE. Reference chapter 2 section G for Manage Rack Slot Status</i> | |||
[[File:image041.jpg|800px]] | |||
<li><b>Battery change complete</b></li> | |||
Return Home button will take you to the home page<br /> | |||
Return Home button will take you to the home page | |||
Change another battery button will start another Battery change operation | Change another battery button will start another Battery change operation | ||
[[File:image043.jpg|800px]] | |||
</ol> | |||
====Change battery with a staged battery in the stage rack (If permission is selected)==== | |||
[[File:image045.jpg|400px]] | |||
<ol> | |||
= | <li><b>Scan old battery</b></li> | ||
<ol style="list-style-type:upper-alpha"> | |||
<li>Scan the battery and truck to change the battery out. </li> | |||
<li>After scanning, move the depleted battery onto the battery extractor and click next to confirm.</li> | |||
</ol> | |||
[[File:image047.jpg|800px]] | |||
<li><b>Retrieve charged battery</b></li> | |||
<ol style="list-style-type:upper-alpha"> | <ol style="list-style-type:upper-alpha"> | ||
<li>Scan the charged battery and the source rack slot indicated by the Fleet Tracker. </li> | |||
<li>After scanning, move the charged battery onto the battery extractor and click next to confirm.</li> | |||
</ol> | |||
<i>If the battery selected is not available, you can Skip Battery, which will bring up the next available one in the queue | |||
NOTE: The skipped battery will be put ON HOLD. Reference chapter 2 section F for Manage Battery holds</i> | |||
[[File:image049.jpg|800px]] | |||
<li><b>Store depleted battery</b></li> | |||
<ol style="list-style-type:upper-alpha"> | <ol style="list-style-type:upper-alpha"> | ||
<li>Scan the depleted battery and the destination rack slot indicated by Fleet Tracker. </li> | |||
<li>After scanning, move the depleted battery to the rack slot and click next to confirm.</li> | |||
</ol> | |||
<i>If the rack slot selected is not available, you can Skip Rack Slot, which will bring up the next available slot | |||
NOTE: The skipped rack slot will be marked INACTIVE. Reference chapter 2 section G for Manage Rack Slot Status</i> | |||
[[File:image051.jpg|800px]] | |||
<li><b>Install new battery</b></li> | |||
<ol style="list-style-type:upper-alpha"></li> | |||
<li>Move the charged battery to the truck. </li> | |||
<li>Then, scan the battery and truck and hit next to confirm that it is installed. | |||
</ol> | |||
[[File:image053.jpg|800px]] | |||
<li><b>Battery change complete</b></li> | |||
Return Home button will take you to the home page<br /> | |||
Change another battery button will start another Battery change operation | |||
[[File:image055.jpg|800px]] | |||
===Transfer Battery (If permission is selected)=== | |||
<b>Purpose:</b> Transfer battery is used when moving a battery to a different rack slot. | |||
This is not used when a battery was stored in the wrong location. Please see Fix Battery location operation. | |||
When moving batteries between multiple systems with Fleet Tracker (as applicable). Please see Decommission/Recommission for this operation. | |||
[[File:image057.jpg|400px]] | |||
<ol> | |||
<li><b>Select battery</b></li> | |||
<ol style="list-style-type:upper-alpha"> | <ol style="list-style-type:upper-alpha"> | ||
<li>Scan battery and its current location.</li> | |||
</ol> | |||
[[File:image059.jpg|800px]] | |||
<li><b>Transfer battery</b></li> | |||
<ol style="list-style-type:upper-alpha"> | <ol style="list-style-type:upper-alpha"> | ||
<li>Transfer the battery</li> | |||
<li>Then scan the battery and location. </li> | |||
<li> Click next to update the battery location in Fleet Tracker and orphan any battery currently assigned to the location.</li> | |||
</ol> | |||
[[File:image061.jpg|800px]] | |||
<li><b>Battery transferred</b></li> | |||
Return Home button will take you to the home page | Return Home button will take you to the home page | ||
<br /> | |||
Transfer another battery button will start another Transfer battery operation | Transfer another battery button will start another Transfer battery operation | ||
[[File:image063.jpg|800px]] | |||
</ol> | |||
This video will demonstrate how to transfer a battery. | This video will demonstrate how to transfer a battery. | ||
<br /> | |||
https://vimeo.com/442005680/ba5d78c3e1 | https://vimeo.com/442005680/ba5d78c3e1 | ||
===Fix Battery Location (If permission is selected)=== | |||
<b>Purpose:</b> Fix battery location operation is used to fix an incorrect location. This occurs when a battery change out is done without using Fleet Tracker. | |||
Purpose: Fix battery location operation is used to fix an incorrect location. This occurs when a battery change out is done without using Fleet Tracker. | |||
[[File:image065.jpg|400px]] | |||
<ol> | |||
<li><b>Fix Battery Location</b></li> | |||
<ol style="list-style-type:upper-alpha"> | |||
<li>Scan the battery and its correct location.</li> | |||
<li>Click next to update the battery location in Fleet Tracker and make any battery currently assigned to the location unknown.</li> | |||
</ol> | |||
[[File:image067.jpg|800px]] | |||
<li><b>Battery location fixed</b></li> | |||
Return Home button will take you to the home page. | |||
<br /> | |||
Fix another battery location button will start another Fix battery location operation | |||
[[File:image069.jpg|800px]] | |||
</ol> | |||
This video will demonstrate how to fix a battery location.<br /> | |||
https://vimeo.com/442009131/ce0178c32c | https://vimeo.com/442009131/ce0178c32c | ||
==Battery Maintenance== | ==Battery Maintenance== | ||
===Water Battery (If permission is selected)=== | ===Water Battery (If permission is selected)=== | ||
[[File:image071.jpg|400px]] | |||
====Procedure from operator page==== | |||
<b>Select Battery that requires Water</b> | |||
<ol> | |||
<li>A list of batteries that are due for watering will appear. Select the battery you would like to water.</li> | |||
<ol style="list-style-type:upper-alpha"> | |||
<li>Water the battery</li> | |||
<li>Then scan the battery and location. Click next to confirm watering complete.</li> | |||
</ol> | |||
[[File:image073.jpg|800px]] | |||
</ol> | |||
<b>Battery watered</b> | |||
<br /> | |||
You can choose to go back to the Home page, or Water another Battery. | |||
[[File:image075.jpg|800px]] | |||
This video will demonstrate how to water a battery. | This video will demonstrate how to water a battery. | ||
<br /> | |||
https://vimeo.com/442012959/1aa42216cd | https://vimeo.com/442012959/1aa42216cd | ||
====Procedure during changeout==== | |||
<b>Water during a Change Out (If permission is selected)</b> | |||
<ol> | |||
<li>Between Steps 3 and 4 of a Battery Change Out (when a charged battery is being installed into the truck), a pop up will appear if the charged battery meets the criteria for Water. | |||
<br /> | |||
====Water during a Change Out (If permission is selected) | |||
Water the battery and scan the barcode on the battery. Once complete click Complete Maintenance. The normal battery change operation will resume. | Water the battery and scan the barcode on the battery. Once complete click Complete Maintenance. The normal battery change operation will resume. | ||
If maintenance is skipped, the battery will remain on the water list and a prompt will appear during the next change out operation. | If maintenance is skipped, the battery will remain on the water list and a prompt will appear during the next change out operation.</li> | ||
</ol> | |||
[[File:image077.jpg|800px]] | |||
===Wash Battery (If permission is selected)=== | ===Wash Battery (If permission is selected)=== | ||
[[File:image079.jpg|400px]] | |||
Move to Wash | |||
[[File:image081.jpg|400px]] | |||
<ol> | |||
<li><b>Select Battery to wash</b></li> | |||
A list of batteries that are due for washing will appear. Select the battery you would like to wash. | A list of batteries that are due for washing will appear. Select the battery you would like to wash. | ||
<ol style="list-style-type:upper-alpha"> | <ol style="list-style-type:upper-alpha"> | ||
<li>Scan the battery to wash and its current location. Click next to confirm battery selection.</li> | |||
</ol> | </ol> | ||
[[File:image083.jpg|800px]] | |||
<li><b>Transfer Battery to Wash</b></li> | |||
<ol style="list-style-type:upper-alpha"> | <ol style="list-style-type:upper-alpha"> | ||
<li>Transfer the battery to the wash station.</li> | |||
<li>Then, scan the battery and the wash station.</li> | |||
<li>Click next to update the battery location in Fleet Tracker and make any battery currently assigned to the location unknown.</li> | |||
<li>Next start the wash cycle on the battery wash cabinet. (See operator manual for wash cabinet for instructions on washing batteries)</li> | |||
<li>Click next to update the battery location in the Fleet Tracker and make any battery currently assigned to the location unknown.</li> | |||
</ol> | |||
[[File:image085.jpg|800px]] | |||
<li><b>Battery Moved to Wash</b></li> | |||
Battery successfully moved to wash. | Battery successfully moved to wash. | ||
<br /> | |||
Click the Return home button. | Click the Return home button. | ||
<br /> | |||
[[File:image087.jpg|800px]] | |||
</ol> | |||
===Retrieve From Wash (If permission is selected)=== | |||
====Retrieve From Wash (If permission is selected)==== | |||
[[File:image089.jpg|400px]] | |||
<ol> | |||
<li><b>Select battery at wash station</b></li> | |||
<ol style="list-style-type:upper-alpha"> | <ol style="list-style-type:upper-alpha"> | ||
<li>Select battery to retrieve.</li> | |||
</ol> | </ol> | ||
[[File:image091.jpg|800px]] | |||
<li><b>Store battery</b></li> | |||
<ol style="list-style-type:upper-alpha"> | <ol style="list-style-type:upper-alpha"> | ||
<li>Store battery in the specified charge rack slot. </li> | |||
<li>Once the battery is transferred to the rack slot, scan the battery and rack slot and click next to confirm.</li> | |||
</ol> | </ol> | ||
<i>If the rack slot selected is not available, you can Skip Rack Slot, which will bring up the next available slot | |||
<br /> | |||
NOTE: The skipped rack slot will be marked INACTIVE. Reference chapter 2 section G for Manage Rack Slot Status</i> | |||
[[File:image093.jpg|800px]] | |||
<li><b>Battery retrieved from wash station</b></li> | |||
Would you like to wash another battery?<br /> | |||
Return Home button will take you to the home page<br /> | |||
Click Wash another battery to start the Wash Battery operation | Click Wash another battery to start the Wash Battery operation | ||
<br /> | |||
[[File:image095.jpg|800px]] | |||
</ol> | |||
This video will demonstrate how to wash a battery. | |||
https://vimeo.com/442011899/a1ed82ad0c | https://vimeo.com/442011899/a1ed82ad0c | ||
==Wash during changeout (if permission is selected)== | ====Wash during changeout (if permission is selected)==== | ||
<ol> | |||
<li>After scanning the battery and truck during '''Battery change out operation''' (if permission is selected) the operator will be prompted to wash the battery if required.</li> | |||
<ol style="list-style-type:upper-alpha"> | <ol style="list-style-type:upper-alpha"> | ||
<li>Scan battery barcode and wash cabinet barcode. Then start the wash cycle and click complete maintenance.</li> | |||
</ol> | |||
<li>Fleet Tracker will then prompt the user to grab the next available battery to install in the truck.</li> | |||
<li>After change out is complete the operator will need to use the '''Retrieve from wash operation''' to retrieve the washed battery.</li> | |||
[[File:image097.jpg|800px]] | |||
</ol> | |||
===Equalize Battery (If permission is selected)=== | |||
[[File:image099.jpg|400px]] | |||
<b>Equalize battery</b> | |||
A list of batteries that are due for equalizing will appear. Select the battery you would like to equalize and use the equalize function on the connected charger to start the cycle. | |||
After equalizing the battery, scan the battery and location. Click next to confirm equalization complete. | After equalizing the battery, scan the battery and location. Click next to confirm equalization complete. | ||
[[File:image101.jpg|800px]] | |||
====Battery equalization is now complete==== | |||
Return Home button will take you to the home page | Return Home button will take you to the home page | ||
<br /> | |||
Equalize another battery button will start another equalize battery operation | Equalize another battery button will start another equalize battery operation | ||
[[File:image103.jpg|800px]] | |||
This video will demonstrate how to equalize a battery. | This video will demonstrate how to equalize a battery. | ||
https://vimeo.com/442008266/60acdff113 | https://vimeo.com/442008266/60acdff113 | ||
====Equalize during changeout (if permission is selected)==== | |||
<ol> | |||
<li>Between Steps 2 and 3 of a Battery Change Out (when a discharged battery is being installed into the rack), a pop up will appear if the discharged battery meets the criteria for equalization.</li> | |||
<ol style="list-style-type:upper-alpha"> | <ol style="list-style-type:upper-alpha"> | ||
<li>Start the equalization cycle for the battery, scan the barcode on the battery and rack location. Once complete click Complete Maintenance. The normal battery change operation will resume.</li> | |||
<li>If maintenance is skipped, the battery will remain on the equalization list and a prompt will appear during the next change out operation.</li> | |||
</ol> | |||
[[File:image105.jpg|800px]] | |||
</ol> | |||
===Decommission Battery (If permission is selected)=== | |||
[[File:image107.jpg|400px]] | |||
<b>Purpose: </b>Decommission is used when a battery needs to be taken out of Fleet Tracker for repair (temporarily) or scrapped (permanently).When a battery is scrapped the asset number then becomes available for future use. | |||
Decommission is also used in combination with Recommission if a battery needs to move between two systems. Follow the below Decommission steps to remove the battery from the original system location. Then follow the Recommission steps to put the battery in its new system location. | Decommission is also used in combination with Recommission if a battery needs to move between two systems. Follow the below Decommission steps to remove the battery from the original system location. Then follow the Recommission steps to put the battery in its new system location. | ||
<ol> | |||
<li><b>Select battery to Decommission</b></li> | |||
<ol style="list-style-type:upper-alpha"> | |||
<li>Scan the battery to decommission and the current location. Click the next step button to confirm battery selection.</li> | |||
</ol> | |||
[[File:image109.jpg|800px]] | |||
<li><b>Confirm decommission</b></li> | |||
<ol style="list-style-type:upper-alpha"> | <ol style="list-style-type:upper-alpha"> | ||
<li>Select the decommission reason, scan the battery to decommission and then type in the reason the battery is being decommissioned. Once complete click Next Step to proceed.</li> | |||
</ol> | |||
[[File:image111.jpg|800px]] | |||
<li><b>Battery decommission complete</b></li> | |||
Remove Battery from system | Remove Battery from system | ||
<br /> | |||
Return Home button will take you to the home page | Return Home button will take you to the home page | ||
<br /> | |||
Decommission another battery button will start another Decommission another battery operation | Decommission another battery button will start another Decommission another battery operation | ||
[[File:image113.jpg|800px]] | |||
</ol> | |||
This video will demonstrate how to decommission a battery. | This video will demonstrate how to decommission a battery. | ||
https://vimeo.com/442006493/1763ebdb94 | https://vimeo.com/442006493/1763ebdb94 | ||
==Recommission Battery (If permission is selected)== | ===Recommission Battery (If permission is selected)=== | ||
[[File:image115.jpg|400px]] | |||
<ol> | |||
<li><b>Select battery to recommission</b></li> | |||
<ol style="list-style-type:upper-alpha"> | <ol style="list-style-type:upper-alpha"> | ||
<li>Scan the battery to recommission. Click next to confirm battery selection.</li> | |||
</ol> | |||
[[File:image117.jpg|800px]] | |||
<li><b>Store recommissioned battery</b></li> | |||
<ol style="list-style-type:upper-alpha"> | <ol style="list-style-type:upper-alpha"> | ||
<li>Store the recommissioned battery in the specified charge rack slot. </li> | |||
<li> Once the battery is transferred to the rack slot, scan the battery and rack slot and click next to confirm.</li> | |||
</ol> | |||
<i>If the rack slot selected is not available, you can Skip Rack Slot, which will bring up the next available slot | |||
<br /> | |||
NOTE: The skipped rack slot will be marked INACTIVE</i> | |||
[[File:image119.jpg|800px]] | |||
<li><b>Battery Recommission Complete</b></li> | |||
Would you like to recommission another battery?<br /> | |||
Return Home button will take you to the home page<br /> | |||
Would you like to recommission another battery? | |||
Return Home button will take you to the home page | |||
Recommission another battery button will start another Recommission another battery operation | Recommission another battery button will start another Recommission another battery operation | ||
[[File:image121.jpg|800px]] | |||
</ol> | |||
This video will demonstrate how to recommission a battery. | This video will demonstrate how to recommission a battery.<br /> | ||
https://vimeo.com/442010459/3095dade8d | https://vimeo.com/442010459/3095dade8d | ||
===Manage Battery Holds (If permission is selected)=== | |||
[[File:image123.jpg|400px]] | |||
<b>Purpose:</b> Batteries can be placed on hold two ways. An operator can mark a battery as on hold if there is an issue with the battery but it does not need to be decommissioned. The other way is during a battery change out if the operator skips the selected battery for retrieval Fleet Tracker will place the battery on hold. This logic assumes something is wrong with the battery and that's the reason the operator skipped it. | |||
<ol> | |||
<li><b>Manage hold status</b></li> | |||
<ol style="list-style-type:upper-alpha"> | <ol style="list-style-type:upper-alpha"> | ||
<li>Scan the battery to change the hold status of a battery and click next to change.</li> | |||
</ol> | |||
[[File:image125.jpg|800px]] | |||
<li><b>Battery hold status updated</b></li> | |||
Return Home button will take you to the home page<br /> | |||
Return Home button will take you to the home page | |||
Manage another battery button will start another Manage battery operation | Manage another battery button will start another Manage battery operation | ||
[[File:image127.jpg|800px]] | |||
</ol> | |||
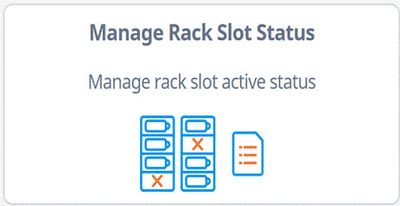
===Manage Rack Slot Status (If permission is selected)=== | |||
[[File:image129.jpg|400px]] | |||
<b>Purpose: </b>Rack slots can be made inactive two ways. An operator can mark a rack slot as inactive if there is an issue with the rack slot. The other way is during a battery change out if the operator skips the open rack slot that was selected by Fleet Tracker, the rack slot will be marked inactive. This logic assumes something is wrong with the rack slot and that's the reason the operator skipped it. | |||
<ol> | |||
<li><b>Manage rack slot status</b></li> | |||
<ol style="list-style-type:upper-alpha"> | <ol style="list-style-type:upper-alpha"> | ||
<li>Scan the rack slot to change the status of the rack slot and click the next step to change.</li> | |||
</ol> | |||
[[File:image131.jpg|800px]] | |||
<li><b>Rack slot status updated</b></li> | |||
Return Home button will take you to the home page<br /> | |||
Manage another rack slot button will start another Rack slot status operation | |||
[[File:image133.jpg|800px]] | |||
</ol> | |||
This video will demonstrate how to manage rack slot status.<br /> | |||
This video will demonstrate how to manage rack slot status. | |||
https://vimeo.com/442009998/35f2143486 | https://vimeo.com/442009998/35f2143486 | ||
==Truck Maintenance== | ==Truck Maintenance== | ||
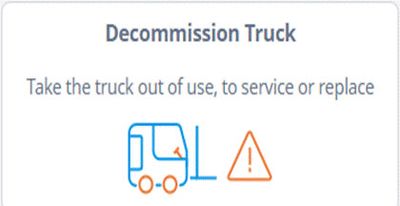
Decommission Truck (If permission is selected) | ===Decommission Truck (If permission is selected)=== | ||
[[File:image135.jpg|400px]] | |||
<b>Purpose:</b> Decommission Truck is used when a truck needs to be taken out of Fleet Tracker for repair (temporarily) or scrapped (permanently).When a truck is scrapped the asset number then becomes available for future use. | |||
<ol> | |||
<li><b>Select truck to decommission</b></li> | |||
<ol style="list-style-type:upper-alpha"> | <ol style="list-style-type:upper-alpha"> | ||
<li>Scan the truck to decommission. Click next to confirm truck selection.</li> | |||
</ol> | |||
[[File:image137.jpg|800px]] | |||
<li><b>Confirm decommission</b></li> | |||
<ol style="list-style-type:upper-alpha"> | |||
<li>Scan truck to decommission. Select reason for decommission.</li> | |||
</ol> | |||
[[File:image139.jpg|800px]] | |||
<li><b>Truck Decommissioning is complete</b></li> | |||
Return Home button will take you to the home page<br /> | |||
Decommission another truck button will start another Decommission truck operation | |||
[[File:image141.jpg|800px]] | |||
</ol> | |||
This video will demonstrate how to decommission a truck.<br /> | |||
https://vimeo.com/442006876/49cc13a3b5 | |||
===Recommission Truck (If permission is selected)=== | |||
[[File:image143.jpg|400px]] | |||
<ol> | |||
<li><b>Select truck to recommission</b></li> | |||
<ol style="list-style-type:upper-alpha"> | <ol style="list-style-type:upper-alpha"> | ||
<li>Scan the truck to recommission. Click next to confirm truck selection.</li> | |||
</ol> | </ol> | ||
[[File:image145.jpg|800px]] | |||
<li><b>Confirm recommission</b></li> | |||
<ol style="list-style-type:upper-alpha"> | <ol style="list-style-type:upper-alpha"> | ||
<li>Scan truck to recommission.</li> | |||
</ol> | </ol> | ||
[[File:image147.jpg|800px]] | |||
Return Home button will take you to the home page | |||
<li><b>Truck recommissioned successfully</li></b> | |||
Return Home button will take you to the home page<br /> | |||
Recommission another truck button will start another Recommission truck operation | Recommission another truck button will start another Recommission truck operation | ||
This video will demonstrate how to recommission a truck. | [[File:image149.jpg|800px]] | ||
</ol> | |||
This video will demonstrate how to recommission a truck.<br /> | |||
https://vimeo.com/442011196/1c2ba4a718 | https://vimeo.com/442011196/1c2ba4a718 | ||
==Tracking (If permission is selected)== | ==Tracking (If permission is selected)== | ||
Purpose: The tracking page allows operators to see where any battery is within Fleet Tracker and open slots. | <b>Purpose: </b>The tracking page allows operators to see where any battery is within Fleet Tracker and open slots. | ||
<b>Available Locations: </b>This page shows any open rack slots. The rack slot name, barcode and type of rack is displayed. | |||
[[File:image151.jpg|800px]] | |||
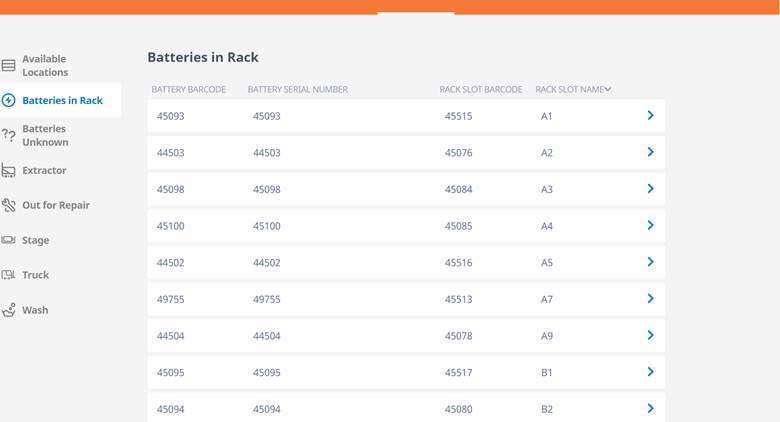
<b>Batteries in Rack:</b> Shows location that currently have a battery in them. The Battery barcode, serial number, rack slot bar code and rack slot name are displayed. The arrow can be clicked to show more information. | |||
[[File:image153.jpg|800px]] | |||
<b>Batteries Unknown:</b> Shows any batteries that currently have no location. Battery barcode, serial number, manufacture, model and last updated date are shown. The arrow can be clicked to show more information. | |||
[[File:image155.jpg|800px]] | |||
<b> Extractor: </b> Shows any battery currently in the extractor. Barcode, serial number and which extractor compartment are shown. The arrow can be clicked to show more information. | |||
[[File:image157.jpg|800px]] | |||
<b>Out for Repair:</b> Shows any Battery/Truck that is out for repair. The arrow can be clicked to show more information. | |||
Out for Repair: Shows any Battery/Truck that is out for repair. The arrow can be clicked to show more information. | |||
[[File:image159.jpg|800px]] | |||
<br /> | |||
[[File:image161.jpg|800px]] | |||
<b>Stage:</b> Shows any battery that is currently in the stage racks. Barcode, serial number, rack slot barcode and name are displayed. | |||
[[File:image163.jpg|800px]] | |||
<b>Truck: </b>Shows all trucks with batteries. Battery barcode, serial number, Truck barcode, truck asset number. | |||
Truck: Shows all trucks with batteries. Battery barcode, serial number, Truck barcode, truck asset number. | |||
[[File:image165.jpg|800px]] | |||
<b>Wash:</b> Shows any batteries in the wash cabinet. Battery barcode, serial number, wash cabinet barcode and name are displayed. | |||
[[File:image167.jpg|800px]] | |||
==Manager Web Portal== | |||
[[File:image169.jpg|800px]] | |||
===Setting up operators=== | |||
<b>Purpose: </b>Web users are the only users that are able to access the Manager Web Portal. Operators are the only users that can access the Operator portal on the tablets and operate Fleet Tracker. A web user can have access to the Web and Operator portal but must be set up as both types of user. | |||
There are many different permissions that can be enabled for extractor operators. Permissions that are not enabled will not show up on the operator’s Operator portal. | |||
<ul> | |||
<li><b>Change Battery:</b> Permission to perform battery changes</li> | |||
<li><b>Fix Battery Location:</b> Permission to run the fix battery location operation</li> | |||
<li><b>Equalize Battery:</b> Permission to use Equalize battery operation</li> | |||
<li><b>Manage Battery Hold:</b> Permission to manage battery holds</li> | |||
<li><b>Change out Wash:</b> Permission to perform a battery wash during a battery change</li> | |||
<li><b>View tracking: </b>Permission to view the tracking page on the Operator portal</li> | |||
<li><b>Stage Battery:</b> Permission to stage batteries on extractor and rack</li> | |||
<li><b>Wash Battery: </b>Permission to use the Wash battery operation</li> | |||
<li><b>Decommission Battery:</b> Permission to decommission batteries</li> | |||
<li><b>Manage Rack Slot Status: </b>Permission to manage rack slot status</li> | |||
<li><b>Change Out Water:</b> Permission to water batteries during battery changes</li> | |||
<li><b>Decommission truck: </b>Permission to decommission trucks</li> | |||
<li><b>Transfer Battery:</b> Permission to use the transfer battery operation</li> | |||
<li><b>Water Battery: </b>Permission to use water battery operation</li> | |||
<li><b>Recommission Battery:</b> Permission to recommission batteries</li> | |||
<li><b>Device Management: </b>Permission De/Reprovision devices to other systems</li> | |||
<li><b>Change Out Equalize:</b> Permission to equalize batteries during battery changes</li> | |||
<li><b>Recommission Truck: </b>Permission to recommission trucks</li> | |||
</ul> | |||
[[File:image171.jpg|800px]] | |||
<ol> | |||
<li>First select Setting at the top of the Manager Web portal screen then Extractor Operators. This brings you to a page where you can view current operators and add new ones.</li> | |||
<li>Select Add Extractor operator to add a new operator.</li> | |||
[[File:image173.jpg|800px]] | |||
<li>Fill in the operator name, select the facility this operator is located and assign a pin code.</li> | |||
<li>Based on the operator and/or facility select the desired operator permissions.</li> | |||
<li>Click Add when complete, operator is now set up. Repeat as necessary for additional operators.</li> | |||
[[File:image175.jpg|800px]] | |||
<li>By clicking the edit icon next to the operator, any of the operator information can be changed.</li> | |||
<li>By clicking the trash can icon any operator can be deleted.</li> | |||
[[File:image177.jpg|800px]] | |||
</ol> | |||
This video will demonstrate how to add operators.<br /> | |||
https://vimeo.com/442003499/db7fca6152<br /> | |||
This video will demonstrate how to edit an operator.<br /> | |||
https://vimeo.com/442007348/34d5fef72f | |||
===User Setup=== | |||
<b>Purpose:</b> A user is an individual that can access the Manager Web Portal and give access to other web users depending on role. | |||
<b>Roles</b> | |||
<b>Admin:</b> Can view all regions and local facilities. Can give access to admin, regional and local users. | |||
<b>Regional: </b>Can view all local facilities in the region. Can give access to regional and local users. | |||
<b>Local:</b> Can view local site. Can give access to local users. | |||
<ol> | |||
<li>First select Setting at the top of the Manager Web Portal screen then Users. This brings you to a page where you can view current users and add new ones.</li> | |||
<li>Select Add User to add a new user.</li> | |||
[[File:image179.jpg|800px]] | |||
<li>Fill in the user information, select desired role and select locations.</li> | |||
[[File:image181.jpg|800px]] | |||
<li>By clicking the edit icon next to the user, any of the user information can be changed.</li> | |||
<li>Users can not be deleted. Please contact BHS for any users that need to be deleted.</li> | |||
[[File:image183.jpg|800px]] | |||
This video will demonstrate how to add | </ol> | ||
https://vimeo.com/ | This video will demonstrate how to add web users.<br /> | ||
https://vimeo.com/442003973/7f3c8ad63e<br /> | |||
This video will demonstrate how to edit | This video will demonstrate how to edit web users.<br /> | ||
https://vimeo.com/ | https://vimeo.com/442007741/10fa683172 | ||
===Adding Assets=== | |||
<b>Purpose:</b> Batteries and Trucks can be added by any Web user to a facility they can view. Battery/Truck models, types and manufactures can only be requested. | |||
<b>Batteries</b> | |||
<ol> | |||
<li>To add a new battery select Batteries at the top followed by Batteries on the left side of the screen.</li> | |||
[[File:image185.jpg|800px]] | |||
<li>Click + Add Battery and the below screen will pop up.</li> | |||
<li>Select the battery manufacture, facility, pool type, model and location this battery will be in Fleet Tracker initially.</li> | |||
<li>Next fill in the barcode, date in service, serial number, asset number.</li> | |||
<li>Finally fill in the maintenance information.</li> | |||
<li>At any time you can view or edit any batteries in Fleet Tracker.</li> | |||
[[File:image187.jpg|800px]] | |||
<li>Battery models/manufacturers can be requested by clicking the request battery model/manufacture button. Fill in the desired model/manufacturer and BHS will add it.</li> | |||
[[File:image189.jpg|800px]] | |||
[[File:image191.jpg|800px]] | |||
</ol> | |||
This video will demonstrate how to add | This video will demonstrate how to add batteries.<br /> | ||
https://vimeo.com/ | https://vimeo.com/442000529/b83b4ed951<br /> | ||
This video will demonstrate how to | This video will demonstrate how to add battery models.<br /> | ||
https://vimeo.com/ | https://vimeo.com/442001300/74ed82f073<br /> | ||
This video will demonstrate how to add battery manufacturers.<br /> | |||
https://vimeo.com/442000948/79431903bc | |||
===Adding Trucks=== | |||
==Adding | <ol> | ||
<li>To add a new truck select Truck at the top followed by Trucks on the left side of the screen.</li> | |||
= | |||
[[File:image193.jpg|800px]] | |||
<li>Click + Add Truck and the below screen will pop up.</li> | |||
<li>Select the manufacture, model, type, facility and pool.</li> | |||
<li>Next fill in the barcode, date in service, serial number, asset number.</li> | |||
[[File:image195.jpg|800px]] | |||
<li>Truck models, types and manufacturers can be requested by clicking the request truck model/types/manufactures button. Fill in the desired model/type/manufacturer and BHS will add it to Fleet Tracker.</li> | |||
[[File:image197.jpg|800px]] | |||
[[File:image199.jpg|800px]] | |||
</ol> | |||
This video will demonstrate how to add trucks. | This video will demonstrate how to add trucks.<br /> | ||
https://vimeo.com/442002868/97ea7a3d96 | https://vimeo.com/442002868/97ea7a3d96<br /> | ||
This video will demonstrate how to add truck types. | This video will demonstrate how to add truck types.<br /> | ||
https://vimeo.com/442002284/aa49664ffc | https://vimeo.com/442002284/aa49664ffc<br /> | ||
This video will demonstrate how to add truck models. | This video will demonstrate how to add truck models.<br /> | ||
https://vimeo.com/442001927/6319ee874f | https://vimeo.com/442001927/6319ee874f<br /> | ||
This video will demonstrate how to add truck manufacturers. | This video will demonstrate how to add truck manufacturers.<br /> | ||
https://vimeo.com/442001513/2da784930e | https://vimeo.com/442001513/2da784930e | ||
===Facility Dashboard=== | |||
[[File:image201.jpg|800px]] | |||
<b>Purpose:</b>The facility dashboard provides an overall health snapshot of the facility. There are four status blocks that break down the information by category. | |||
<b>Facilities:</b> Allows you to select the different facilities that you can view or view all together as one summary. | |||
[[File:image203.jpg|400px]] | |||
<b>System Status: </b>Shows available batteries in Fleet Tracker by pool along with changeout time. | |||
<b>Available Batteries by Pool</b> tell you how many batteries have been in Fleet Tracker for 16 hours. Green, Yellow and Red dots advise what percentage of total batteries in your facility for that pool are available. 10%+ Green, 10 - 5% Yellow, 5 - 0% Red. Low battery available counts indicate either a fleet shortage or too many in abnormal status. | |||
<b>Average Change Out Time</b> shows how long from starting the battery change operation to completion is taking. Green, Yellow and Red dots advise change out time ranges. 0-8 min Green, 8-10 min Yellow, 10+ min Red. Higher change out times could indicate a need for more training. | |||
[[File:image205.jpg|400px]] | |||
<b>Maintenance Status:</b> Displays maintenance activities to be completed and items out for repair. | |||
<b>Wash</b> shows the amount of due or overdue batteries needing wash. Green, Yellow and Red dots advise the amount of batteries needing washed for the fleet. 0-5% Green, 5-10% Yellow, 10%+ Red. Use the <u>Wash Battery Operation</u> to view and wash batteries. | |||
<b>Water</b> shows the amount of due or overdue batteries needing water. Green, Yellow and Red dots advise the amount of batteries needing watered for the fleet. 0-5% Green, 5-10% Yellow, 10%+ Red. Use the <u>Water Battery Operation </u>to view and water batteries. | |||
<b>Equalize</b> shows the amount of due or overdue batteries needing equalized. Green, Yellow and Red dots advise the amount of batteries needing equalized for the fleet. 0-5% Green, 5-10% Yellow, 10%+ Red. Use the <u>Equalize Battery Operation </u>to view and equalize batteries. | |||
<b>Batteries out for Repair </b>shows the amount of batteries out for repair. Use the <u>Recommission Battery Operation</u> to view and recommission batteries. | |||
<b>Trucks out for repair</b> shows the amount of trucks out for repair. Use the <u>Recommission Truck Operation </u>to view and recommission trucks. | |||
[[File:image207.jpg|400px]] | |||
<b>Abnormal Status:</b> Displays abnormal items that need to be addressed. | |||
<b>Batteries on Hold</b> tells how many batteries are currently on the hold list and average time. Use the <u>Battery Hold Operation </u>to view the batteries and remove from hold. | |||
<b>Unknown Batteries </b>is how many batteries have been displaced by error and location is unknown. Use <u>Tracking Page</u> and <u>Fix Battery Location operation </u>to correct the unknown batteries. | |||
<b>Inactive Rack Slots </b> shows how many slots are marked inactive by skipping slots or are damaged. Use <u>Manage Rack Slot Status Operation</u> to view and manage. | |||
<b>Battery Change Totals per Day:</b> Shows number of battery changes a day via bar graph over 7 days. You can hover the cursor over the individual bar to see an exact count. | |||
[[File:image209.jpg|800px]] | |||
===Reporting=== | |||
<b>Purpose:</b> Standard reports are available on the Manager Web Portal by clicking “Reports” at the top of the Manager Web Portal screen. Reports are facility specific, therefore if you have access to view multiple systems or facilities, you will also have access to view the corresponding reports. <b><i>Note: If you do not see any reports, contact the BHS Web Portal Support Team at [mailto:flt-iiot@bhs1.com flt-iiot@bhs1.com].</i></b> | |||
<b>Accessing & Viewing Reports:</b> | |||
<ol> | |||
<li> Select “Reports” at the top of Manager Web Portal Screen</li> | |||
<li>Select your Facility “Group” “Region” and “Facility” you wish to view</li> | |||
<li>A Welcome / Table of Contents screen will appear with the available reports to view.</li> | |||
<li>To navigate through the list of reports, click the arrow buttons at the bottom right of the screen (shown below). By clicking the arrow buttons, it will navigate you to the next or previous report accordingly.</li> | |||
[[File:image211.jpg|800px]] | |||
<li> Each report has basic functionality for filtering and sorting based on the type of report. Additional support and questions regarding reports can be sent to our BHS Web Portal Support Team at [mailto:flt-iiot@bhs1.com flt-iiot@bhs1.com].</li> | |||
</ol> | |||
==Adding Racks or Rack Slots== | |||
<b>Adding Racks:</b> Adding additional racks or different racks can only be performed by BHS. Please contact BHS for assistance. | |||
[[File:image213.jpg|800px]] | |||
<b>Adding Rack Slots: </b>Adding additional rack slots or reassigning rack slots can only be performed by BHS. Please contact BHS for assistance. | |||
[[File:image215.jpg|800px]] | |||
Latest revision as of 22:11, 28 July 2020
Looking for a specific replacement part? Ctrl-F (or Command-F for Mac users) brings up your browsers search panel and can search any text on the entire web page. Find parts by searching a part# or part description.
Register your equipment with BHS Optima, BHS's free app.
California Residents: WARNING: This product contains chemicals known to the State of California to cause cancer and/or reproductive harm, and birth defects or other reproductive harm. Learn more here.
Fleet Tracker Operation Instructions (IOP-FLTIIOT)
Fleet Tracker includes a Tablet, Scanner and Pen/Stylus.

A wifi connection is required for operation of fleet tracker. Contact BHS if there is any trouble connecting to your wifi network.
System Information
Select Fleet Tracker on the Tablet Desktop which will take you to the operator login screen. Your login will time out after 30 minutes and you will need to log in again to continue.


Battery Handling
Change Battery

Change out Procedure
- Scan old battery
- Scan the battery and truck to change the battery out. Input current truck hour reading (If applicable)
- After scanning and inputting truck hours, move the depleted battery onto the battery extractor and click next step to confirm.
- Retrieve Charged Battery
- Scan the charged battery and the source rack slot indicated by Fleet Tracker.
- After scanning, move the charged battery onto the extractor and click next to confirm.
- Store depleted battery
- Scan the depleted battery and the destination rack slot indicated by the Fleet Tracker.
- After scanning, move the depleted battery to the rack slot and click next to confirm.
- Install new battery
- Move the charged battery to the truck.
- Then, scan the battery and truck and click next to confirm that it is installed.

If the battery selected by Fleet Tracker is not available, you can Skip Battery, which will bring up the next available one in the queue.
Note: The skipped battery will be put ON HOLD. reference chapter 2 section F for Manage Battery holds

If the rack slot selected is not available, you can Skip Rack Slot, which will bring up the next available slot
NOTE: The skipped rack slot will be marked INACTIVE. Reference chapter 2 section G for Manage Rack Slot Status


Battery change is now complete
Return Home button will take you to the home page Change another battery button will start another Battery change operation

This video will demonstrate a battery change out.
https://vimeo.com/442004589/5547460a3e
Stage Battery (If permission is selected)

Purpose
Purpose: Facilities may choose to stage batteries to allow for faster change outs. By having the battery stored in the rack or on the extractor, the next available battery is already selected and ready to install in the truck.
Stage Battery To Staging Rack Slot

Procedure
- Select Battery
- Select pool type of battery to stage
- Then scan the specified battery and location.
- Transfer battery to stage
- Store battery in the specified charge rack slot.
- Once the battery is transferred to the rack slot, scan the battery and rack slot and click next to confirm.


If the battery selected is not available, you can Skip Battery, which will bring up the next available one in the queue
NOTE: The skipped battery will be put ON HOLD. Reference chapter 2 section F for Manage Battery holds

The battery is now stored in the stage rack and is ready for use when a truck in the same pool type comes in for a battery change.
This video will demonstrate how to stage a battery.
https://vimeo.com/442005217/6ea6f18e0f
Stage Battery to Extractor
- Stage Battery
- Select pool type of battery to stage
- Then scan the specified battery and location.

If the battery selected is not available, you can Skip Battery, which will bring up the next available one in the queue
NOTE: The skipped battery will be put ON HOLD. Reference chapter 2 section F for Manage Battery holds

The battery is now staged on the extractor and is ready for use when a truck in the same pool type comes in for a battery change.
Change a battery with a staged battery on the extractor (If permission is selected)

- Scan old battery
- Scan the battery and truck to change the battery out.
- After scanning, move the depleted battery onto the battery extractor and click next to confirm.
- Install new battery
- Move the charged battery to the truck.
- Then, scan the battery and truck and hit next to confirm that it is installed.
- Store depleted battery
- Scan the depleted battery and the destination rack slot indicated by the Fleet Tracker.
- After scanning, move the depleted battery to the rack slot and click next to confirm.
- Battery change complete Return Home button will take you to the home page


If the rack slot selected is not available, you can Skip Rack Slot, which will bring up the next available slot
NOTE: The skipped rack slot will be marked INACTIVE. Reference chapter 2 section G for Manage Rack Slot Status

Change another battery button will start another Battery change operation

Change battery with a staged battery in the stage rack (If permission is selected)

- Scan old battery
- Scan the battery and truck to change the battery out.
- After scanning, move the depleted battery onto the battery extractor and click next to confirm.
- Retrieve charged battery
- Scan the charged battery and the source rack slot indicated by the Fleet Tracker.
- After scanning, move the charged battery onto the battery extractor and click next to confirm.
- Store depleted battery
- Scan the depleted battery and the destination rack slot indicated by Fleet Tracker.
- After scanning, move the depleted battery to the rack slot and click next to confirm.
- Install new battery
- Move the charged battery to the truck.
- Then, scan the battery and truck and hit next to confirm that it is installed.
- Battery change complete Return Home button will take you to the home page
- Select battery
- Scan battery and its current location.
- Transfer battery
- Transfer the battery
- Then scan the battery and location.
- Click next to update the battery location in Fleet Tracker and orphan any battery currently assigned to the location.
- Battery transferred Return Home button will take you to the home page
- Fix Battery Location
- Scan the battery and its correct location.
- Click next to update the battery location in Fleet Tracker and make any battery currently assigned to the location unknown.
- Battery location fixed Return Home button will take you to the home page.
- A list of batteries that are due for watering will appear. Select the battery you would like to water.
- Water the battery
- Then scan the battery and location. Click next to confirm watering complete.
- Between Steps 3 and 4 of a Battery Change Out (when a charged battery is being installed into the truck), a pop up will appear if the charged battery meets the criteria for Water.
Water the battery and scan the barcode on the battery. Once complete click Complete Maintenance. The normal battery change operation will resume. If maintenance is skipped, the battery will remain on the water list and a prompt will appear during the next change out operation. - Select Battery to wash A list of batteries that are due for washing will appear. Select the battery you would like to wash.
- Scan the battery to wash and its current location. Click next to confirm battery selection.
- Transfer Battery to Wash
- Transfer the battery to the wash station.
- Then, scan the battery and the wash station.
- Click next to update the battery location in Fleet Tracker and make any battery currently assigned to the location unknown.
- Next start the wash cycle on the battery wash cabinet. (See operator manual for wash cabinet for instructions on washing batteries)
- Click next to update the battery location in the Fleet Tracker and make any battery currently assigned to the location unknown.
- Battery Moved to Wash Battery successfully moved to wash.
- Select battery at wash station
- Select battery to retrieve.
- Store battery
- Store battery in the specified charge rack slot.
- Once the battery is transferred to the rack slot, scan the battery and rack slot and click next to confirm.
- Battery retrieved from wash station Would you like to wash another battery?
- After scanning the battery and truck during Battery change out operation (if permission is selected) the operator will be prompted to wash the battery if required.
- Scan battery barcode and wash cabinet barcode. Then start the wash cycle and click complete maintenance.
- Fleet Tracker will then prompt the user to grab the next available battery to install in the truck.
- After change out is complete the operator will need to use the Retrieve from wash operation to retrieve the washed battery.
- Between Steps 2 and 3 of a Battery Change Out (when a discharged battery is being installed into the rack), a pop up will appear if the discharged battery meets the criteria for equalization.
- Start the equalization cycle for the battery, scan the barcode on the battery and rack location. Once complete click Complete Maintenance. The normal battery change operation will resume.
- If maintenance is skipped, the battery will remain on the equalization list and a prompt will appear during the next change out operation.
- Select battery to Decommission
- Scan the battery to decommission and the current location. Click the next step button to confirm battery selection.
- Confirm decommission
- Select the decommission reason, scan the battery to decommission and then type in the reason the battery is being decommissioned. Once complete click Next Step to proceed.
- Battery decommission complete Remove Battery from system
- Select battery to recommission
- Scan the battery to recommission. Click next to confirm battery selection.
- Store recommissioned battery
- Store the recommissioned battery in the specified charge rack slot.
- Once the battery is transferred to the rack slot, scan the battery and rack slot and click next to confirm.
- Battery Recommission Complete Would you like to recommission another battery?
- Manage hold status
- Scan the battery to change the hold status of a battery and click next to change.
- Battery hold status updated Return Home button will take you to the home page
- Manage rack slot status
- Scan the rack slot to change the status of the rack slot and click the next step to change.
- Rack slot status updated Return Home button will take you to the home page
- Select truck to decommission
- Scan the truck to decommission. Click next to confirm truck selection.
- Confirm decommission
- Scan truck to decommission. Select reason for decommission.
- Truck Decommissioning is complete Return Home button will take you to the home page
- Select truck to recommission
- Scan the truck to recommission. Click next to confirm truck selection.
- Confirm recommission
- Scan truck to recommission.
- Truck recommissioned successfully Return Home button will take you to the home page
- Change Battery: Permission to perform battery changes
- Fix Battery Location: Permission to run the fix battery location operation
- Equalize Battery: Permission to use Equalize battery operation
- Manage Battery Hold: Permission to manage battery holds
- Change out Wash: Permission to perform a battery wash during a battery change
- View tracking: Permission to view the tracking page on the Operator portal
- Stage Battery: Permission to stage batteries on extractor and rack
- Wash Battery: Permission to use the Wash battery operation
- Decommission Battery: Permission to decommission batteries
- Manage Rack Slot Status: Permission to manage rack slot status
- Change Out Water: Permission to water batteries during battery changes
- Decommission truck: Permission to decommission trucks
- Transfer Battery: Permission to use the transfer battery operation
- Water Battery: Permission to use water battery operation
- Recommission Battery: Permission to recommission batteries
- Device Management: Permission De/Reprovision devices to other systems
- Change Out Equalize: Permission to equalize batteries during battery changes
- Recommission Truck: Permission to recommission trucks
- First select Setting at the top of the Manager Web portal screen then Extractor Operators. This brings you to a page where you can view current operators and add new ones.
- Select Add Extractor operator to add a new operator.
- Fill in the operator name, select the facility this operator is located and assign a pin code.
- Based on the operator and/or facility select the desired operator permissions.
- Click Add when complete, operator is now set up. Repeat as necessary for additional operators.
- By clicking the edit icon next to the operator, any of the operator information can be changed.
- By clicking the trash can icon any operator can be deleted.
- First select Setting at the top of the Manager Web Portal screen then Users. This brings you to a page where you can view current users and add new ones.
- Select Add User to add a new user.
- Fill in the user information, select desired role and select locations.
- By clicking the edit icon next to the user, any of the user information can be changed.
- Users can not be deleted. Please contact BHS for any users that need to be deleted.
- To add a new battery select Batteries at the top followed by Batteries on the left side of the screen.
- Click + Add Battery and the below screen will pop up.
- Select the battery manufacture, facility, pool type, model and location this battery will be in Fleet Tracker initially.
- Next fill in the barcode, date in service, serial number, asset number.
- Finally fill in the maintenance information.
- At any time you can view or edit any batteries in Fleet Tracker.
- Battery models/manufacturers can be requested by clicking the request battery model/manufacture button. Fill in the desired model/manufacturer and BHS will add it.
- To add a new truck select Truck at the top followed by Trucks on the left side of the screen.
- Click + Add Truck and the below screen will pop up.
- Select the manufacture, model, type, facility and pool.
- Next fill in the barcode, date in service, serial number, asset number.
- Truck models, types and manufacturers can be requested by clicking the request truck model/types/manufactures button. Fill in the desired model/type/manufacturer and BHS will add it to Fleet Tracker.
- Select “Reports” at the top of Manager Web Portal Screen
- Select your Facility “Group” “Region” and “Facility” you wish to view
- A Welcome / Table of Contents screen will appear with the available reports to view.
- To navigate through the list of reports, click the arrow buttons at the bottom right of the screen (shown below). By clicking the arrow buttons, it will navigate you to the next or previous report accordingly.
- Each report has basic functionality for filtering and sorting based on the type of report. Additional support and questions regarding reports can be sent to our BHS Web Portal Support Team at flt-iiot@bhs1.com.

If the battery selected is not available, you can Skip Battery, which will bring up the next available one in the queue
NOTE: The skipped battery will be put ON HOLD. Reference chapter 2 section F for Manage Battery holds

If the rack slot selected is not available, you can Skip Rack Slot, which will bring up the next available slot
NOTE: The skipped rack slot will be marked INACTIVE. Reference chapter 2 section G for Manage Rack Slot Status


Change another battery button will start another Battery change operation

Transfer Battery (If permission is selected)
Purpose: Transfer battery is used when moving a battery to a different rack slot.
This is not used when a battery was stored in the wrong location. Please see Fix Battery location operation.
When moving batteries between multiple systems with Fleet Tracker (as applicable). Please see Decommission/Recommission for this operation.


Transfer another battery button will start another Transfer battery operation

This video will demonstrate how to transfer a battery.
https://vimeo.com/442005680/ba5d78c3e1
Fix Battery Location (If permission is selected)
Purpose: Fix battery location operation is used to fix an incorrect location. This occurs when a battery change out is done without using Fleet Tracker.


Fix another battery location button will start another Fix battery location operation

This video will demonstrate how to fix a battery location.
https://vimeo.com/442009131/ce0178c32c
Battery Maintenance
Water Battery (If permission is selected)

Procedure from operator page
Select Battery that requires Water

Battery watered
You can choose to go back to the Home page, or Water another Battery.

This video will demonstrate how to water a battery.
https://vimeo.com/442012959/1aa42216cd
Procedure during changeout
Water during a Change Out (If permission is selected)

Wash Battery (If permission is selected)

Move to Wash


Click the Return home button.

Retrieve From Wash (If permission is selected)


If the rack slot selected is not available, you can Skip Rack Slot, which will bring up the next available slot
NOTE: The skipped rack slot will be marked INACTIVE. Reference chapter 2 section G for Manage Rack Slot Status

Return Home button will take you to the home page
Click Wash another battery to start the Wash Battery operation

This video will demonstrate how to wash a battery.
https://vimeo.com/442011899/a1ed82ad0c
Wash during changeout (if permission is selected)

Equalize Battery (If permission is selected)

Equalize battery
A list of batteries that are due for equalizing will appear. Select the battery you would like to equalize and use the equalize function on the connected charger to start the cycle.
After equalizing the battery, scan the battery and location. Click next to confirm equalization complete.

Battery equalization is now complete
Return Home button will take you to the home page
Equalize another battery button will start another equalize battery operation

This video will demonstrate how to equalize a battery.
https://vimeo.com/442008266/60acdff113
Equalize during changeout (if permission is selected)

Decommission Battery (If permission is selected)

Purpose: Decommission is used when a battery needs to be taken out of Fleet Tracker for repair (temporarily) or scrapped (permanently).When a battery is scrapped the asset number then becomes available for future use.
Decommission is also used in combination with Recommission if a battery needs to move between two systems. Follow the below Decommission steps to remove the battery from the original system location. Then follow the Recommission steps to put the battery in its new system location.


Return Home button will take you to the home page
Decommission another battery button will start another Decommission another battery operation

This video will demonstrate how to decommission a battery.
https://vimeo.com/442006493/1763ebdb94
Recommission Battery (If permission is selected)


If the rack slot selected is not available, you can Skip Rack Slot, which will bring up the next available slot
NOTE: The skipped rack slot will be marked INACTIVE

Return Home button will take you to the home page
Recommission another battery button will start another Recommission another battery operation

This video will demonstrate how to recommission a battery.
https://vimeo.com/442010459/3095dade8d
Manage Battery Holds (If permission is selected)

Purpose: Batteries can be placed on hold two ways. An operator can mark a battery as on hold if there is an issue with the battery but it does not need to be decommissioned. The other way is during a battery change out if the operator skips the selected battery for retrieval Fleet Tracker will place the battery on hold. This logic assumes something is wrong with the battery and that's the reason the operator skipped it.

Manage another battery button will start another Manage battery operation

Manage Rack Slot Status (If permission is selected)

Purpose: Rack slots can be made inactive two ways. An operator can mark a rack slot as inactive if there is an issue with the rack slot. The other way is during a battery change out if the operator skips the open rack slot that was selected by Fleet Tracker, the rack slot will be marked inactive. This logic assumes something is wrong with the rack slot and that's the reason the operator skipped it.

Manage another rack slot button will start another Rack slot status operation

This video will demonstrate how to manage rack slot status.
https://vimeo.com/442009998/35f2143486
Truck Maintenance
Decommission Truck (If permission is selected)

Purpose: Decommission Truck is used when a truck needs to be taken out of Fleet Tracker for repair (temporarily) or scrapped (permanently).When a truck is scrapped the asset number then becomes available for future use.


Decommission another truck button will start another Decommission truck operation

This video will demonstrate how to decommission a truck.
https://vimeo.com/442006876/49cc13a3b5
Recommission Truck (If permission is selected)


Recommission another truck button will start another Recommission truck operation

This video will demonstrate how to recommission a truck.
https://vimeo.com/442011196/1c2ba4a718
Tracking (If permission is selected)
Purpose: The tracking page allows operators to see where any battery is within Fleet Tracker and open slots.
Available Locations: This page shows any open rack slots. The rack slot name, barcode and type of rack is displayed.

Batteries in Rack: Shows location that currently have a battery in them. The Battery barcode, serial number, rack slot bar code and rack slot name are displayed. The arrow can be clicked to show more information.

Batteries Unknown: Shows any batteries that currently have no location. Battery barcode, serial number, manufacture, model and last updated date are shown. The arrow can be clicked to show more information.

Extractor: Shows any battery currently in the extractor. Barcode, serial number and which extractor compartment are shown. The arrow can be clicked to show more information.

Out for Repair: Shows any Battery/Truck that is out for repair. The arrow can be clicked to show more information.


Stage: Shows any battery that is currently in the stage racks. Barcode, serial number, rack slot barcode and name are displayed.

Truck: Shows all trucks with batteries. Battery barcode, serial number, Truck barcode, truck asset number.

Wash: Shows any batteries in the wash cabinet. Battery barcode, serial number, wash cabinet barcode and name are displayed.

Manager Web Portal

Setting up operators
Purpose: Web users are the only users that are able to access the Manager Web Portal. Operators are the only users that can access the Operator portal on the tablets and operate Fleet Tracker. A web user can have access to the Web and Operator portal but must be set up as both types of user.
There are many different permissions that can be enabled for extractor operators. Permissions that are not enabled will not show up on the operator’s Operator portal.


This video will demonstrate how to add operators.
https://vimeo.com/442003499/db7fca6152
This video will demonstrate how to edit an operator.
https://vimeo.com/442007348/34d5fef72f
User Setup
Purpose: A user is an individual that can access the Manager Web Portal and give access to other web users depending on role.
Roles
Admin: Can view all regions and local facilities. Can give access to admin, regional and local users.
Regional: Can view all local facilities in the region. Can give access to regional and local users.
Local: Can view local site. Can give access to local users.


This video will demonstrate how to add web users.
https://vimeo.com/442003973/7f3c8ad63e
This video will demonstrate how to edit web users.
https://vimeo.com/442007741/10fa683172
Adding Assets
Purpose: Batteries and Trucks can be added by any Web user to a facility they can view. Battery/Truck models, types and manufactures can only be requested.
Batteries


This video will demonstrate how to add batteries.
https://vimeo.com/442000529/b83b4ed951
This video will demonstrate how to add battery models.
https://vimeo.com/442001300/74ed82f073
This video will demonstrate how to add battery manufacturers.
https://vimeo.com/442000948/79431903bc
Adding Trucks


This video will demonstrate how to add trucks.
https://vimeo.com/442002868/97ea7a3d96
This video will demonstrate how to add truck types.
https://vimeo.com/442002284/aa49664ffc
This video will demonstrate how to add truck models.
https://vimeo.com/442001927/6319ee874f
This video will demonstrate how to add truck manufacturers.
https://vimeo.com/442001513/2da784930e
Facility Dashboard

Purpose:The facility dashboard provides an overall health snapshot of the facility. There are four status blocks that break down the information by category.
Facilities: Allows you to select the different facilities that you can view or view all together as one summary.

System Status: Shows available batteries in Fleet Tracker by pool along with changeout time.
Available Batteries by Pool tell you how many batteries have been in Fleet Tracker for 16 hours. Green, Yellow and Red dots advise what percentage of total batteries in your facility for that pool are available. 10%+ Green, 10 - 5% Yellow, 5 - 0% Red. Low battery available counts indicate either a fleet shortage or too many in abnormal status.
Average Change Out Time shows how long from starting the battery change operation to completion is taking. Green, Yellow and Red dots advise change out time ranges. 0-8 min Green, 8-10 min Yellow, 10+ min Red. Higher change out times could indicate a need for more training.

Maintenance Status: Displays maintenance activities to be completed and items out for repair. Wash shows the amount of due or overdue batteries needing wash. Green, Yellow and Red dots advise the amount of batteries needing washed for the fleet. 0-5% Green, 5-10% Yellow, 10%+ Red. Use the Wash Battery Operation to view and wash batteries.
Water shows the amount of due or overdue batteries needing water. Green, Yellow and Red dots advise the amount of batteries needing watered for the fleet. 0-5% Green, 5-10% Yellow, 10%+ Red. Use the Water Battery Operation to view and water batteries.
Equalize shows the amount of due or overdue batteries needing equalized. Green, Yellow and Red dots advise the amount of batteries needing equalized for the fleet. 0-5% Green, 5-10% Yellow, 10%+ Red. Use the Equalize Battery Operation to view and equalize batteries.
Batteries out for Repair shows the amount of batteries out for repair. Use the Recommission Battery Operation to view and recommission batteries.
Trucks out for repair shows the amount of trucks out for repair. Use the Recommission Truck Operation to view and recommission trucks.

Abnormal Status: Displays abnormal items that need to be addressed.
Batteries on Hold tells how many batteries are currently on the hold list and average time. Use the Battery Hold Operation to view the batteries and remove from hold.
Unknown Batteries is how many batteries have been displaced by error and location is unknown. Use Tracking Page and Fix Battery Location operation to correct the unknown batteries.
Inactive Rack Slots shows how many slots are marked inactive by skipping slots or are damaged. Use Manage Rack Slot Status Operation to view and manage.
Battery Change Totals per Day: Shows number of battery changes a day via bar graph over 7 days. You can hover the cursor over the individual bar to see an exact count.

Reporting
Purpose: Standard reports are available on the Manager Web Portal by clicking “Reports” at the top of the Manager Web Portal screen. Reports are facility specific, therefore if you have access to view multiple systems or facilities, you will also have access to view the corresponding reports. Note: If you do not see any reports, contact the BHS Web Portal Support Team at flt-iiot@bhs1.com.
Accessing & Viewing Reports:

Adding Racks or Rack Slots
Adding Racks: Adding additional racks or different racks can only be performed by BHS. Please contact BHS for assistance.

Adding Rack Slots: Adding additional rack slots or reassigning rack slots can only be performed by BHS. Please contact BHS for assistance.
